Photography Tips from a Professional Photographer

posted on: December 15, 2018

The following links and blog posts have been written over years of working as a professional digital photographer with a background of practice in film photography.  These articles are written to a broad and general audience interested in a professional perspective on the various aspects and issues involved in digital photography.  Each topic links to a new post.

What You Should Know About Your Photos:

Behind-the-Scenes Production of Photography:


The Business of Being a Professional Creative:


World Trade Inspired | Behind The Image

posted on: November 24, 2015

It's hard to think of interiors and architecture as having "moments", but this was one of those moments when several things aligned and made me geek out about an otherwise very plain image of office furniture.  

World Trade Inspired Office Furnishing Interior Photography


I knew I wanted a detail of the carpet, stools, filing cabinets, and desk, to highlight some of the designer's choices, but there were several of these to choose from throughout the office, so I kept looking until something inspired me. Then I noticed a set with the One World Trade building right outside the window- and that's when the "moment" of inspiration struck. Not only were the stools shaped like One World Trade as the edges angled upward toward a flat rounded top, but the carpet's hexagon design was a close relative of the octagon formed in the middle of the One World Trade building as its isosceles triangle facades aligned at even widths. Finally, my creative vision for making stools, carpet, and filing cabinets look more interesting.

The only problem was you couldn't tell exactly what building was out the window from the standing height normally appropriate for this desk. In a straight-on-view mid-height, the mirrored facade of OWT reflected the mid-height clouds in the sky and distorted some of the building shape.  So I squatted lower, and lower, and then even lower, until basically laying on the ground for a window perspective looking upward that allowed the crowning shape of OWT to be compared to the detail of the stools and carpet.  To give you a broader image of this scene, there were people working in this open layout office while I was there, just going about their regular office routines until spotting me essentially laying on the ground in the middle of their office to take a photo of some stools. It's probably good that I'm not embarrassed easily. When a "moment" of inspiration strikes, I'll do whatever it takes to make it work.

However, the work never stops at the capture of the image. This image wasn't actually possible in the camera itself, so if you'd like to know a little more about the technical process of creating it, read on...

First it required two different RAW exposures on site in order to get a proper exposure of the interior and a proper exposure of the exterior. From the settings below you can see these exposures are 3 stops apart (the only difference was changing the shutter speed from 1/10th of a second to 1/80th of a second). While RAW files can be pushed and pulled about 1 stop of light in over or under exposure without too many artifacts or distortions, anything beyond a full stop difference really needs to be a separate exposure.


Next was color correcting the interior image color to more accurately reflect the material and design colors without too much of the florescent orange light color cast and without too much natural blue light color cast. This is one of the most subjective parts of editing because it relies on the color sensitivity of our eyes both on site when photographing as well as our color memory when we're behind the computer.  The window exposure was already perfectly daylight balanced. If I tried to color correct after combining images, the window view would become an unnatural neon blue.

While many people think a grey card can solve the problem, it isn't very reliable under mixed lighting conditions and is highly likely that you'll still end up tweaking it in post-production to find something that balances better over the entire scene. Grey cards are great when you have consistent color across scenes as you do with studio lighting, but interiors are a messy blend of natural and artificial light, sometimes up to five different color tones of light across one space. If you're color blind, yes, use a grey card to get colors somewhere close to where they need to be. If you have great color sensitivity, you'll likely be doing the same amount of adjustments with or without a grey card.

Once my interior colors were as close as I could get to what I saw when I was on location when adjusting for various color reflections, the next step was to bring the window exposure detail into the interior exposure image using layers and masks in Photoshop. Sometimes it's possible to combine exposures with HDR software, but I've found that you end up losing a lot of latitude in highlights and colors when a software tries to average different images together.  

To demonstrate this, below is an example of the best possible detail after using HDR software on the left, versus masking in the window exposure manually on the right. The HDR software failed to pull in any of the blue sky outside, and yet decided to fill in a highlight on the filing cabinet with a blue color cast. You can also see how the HDR version reduces the amount of detail in the ceiling. Occasionally, when exposures are close enough, HDR software can be effective, but when the difference is this dramatic and selective, masking provides more control. I was also very careful not to allow the window scene to be bolder than the interior, because that would also be unnatural to the eye, and take the focus off of the interior design choices.

I believe that when an image is crafted well, you don't actually see all of the work that went into it. If it looks as natural on screen as it would to our eye in person, than I feel like I've done my job well to convey the design as clearly as the air that surrounds it.

Why Do I Look Different In Photos? 3 Factors That Affect Your Portrait

posted on: April 20, 2015

Before I was a photographer, I just couldn't wrap my head around why I looked SO different in other people's photos than I thought I looked like in real life.  I felt like no matter who took photos of me, it was never the same person in the photo than who I was used to seeing in the mirror or in selfies!  If you feel this way, you're absolutely right, but it's because you actually never get to see yourself as the world sees you until you look at a photograph.  

Garbo_Dreams_Web_2014-37
Scene & a most unflattering portrait from Garbo Dreams by Lauren LoGiudice 

You aren't crazy, or abnormal to think you don't look like yourself in photos, but there are three important factors that can make your portrait look more or less familiar to you:

1. The Mirror Effect
Any time you look in a mirror, you're actually seeing your identical "evil" twin who fools you into thinking this is what you look like to everyone else.  This person is who you have come to think is your image, but it's actually a reversed image of what everyone else sees.  That mole is not actually on the right side of your face as it appears in the mirror, it's on the left side.  Your larger eye is not actually the left eye you see in the mirror, it's the right eye (and yes, almost everyone has a larger or smaller eye).  Since many forward-facing "selfie" cameras mimic this mirrored effect, you're always seeing your mirrored twin, rather than the person that everyone else sees when they look at you.  A photograph reflects back your actual self, as others really see you, with a few other variables to consider, as mentioned below.  You notice all of the differences because they are new to your eye versus the image your brain has imprinted as what you look like.

via GIPHY

2. The Lens Effect
The human eye is equivalent to a roughly 45mm lens on a full-frame DSLR.  This means that your portrait will often appear different if the lens used to photograph you is wider than 40mm or tighter than 50mm on a full frame DSLR.  Many portrait and headshot photographers use lenses in the 70-200mm range that end up compressing the relationship between the tip of your nose and the back of your head, which can often reduce any facial features that may feel exaggerated when looking at yourself in the mirror with your 45mm lens eyeballs.  However, if a photographer uses something as wide as a 24mm lens for a portrait, it will often exaggerate any features and distances between them on the canvas of a face.  If possible, ask your photographer to use a few different lens focal lengths to help you decide which version of your face looks best to you in print.  A photographer also has the ability to see your face at a higher or lower perspective than you usually do, so when that is combined with a lens choice, it can affect which features are more or less prominent in the 2-Dimensional photo.

Lighting Tests-009.jpg

3. The Lighting Effect
Most of us view ourselves in overhead lighting, whether it's in the bathroom with the lights centered above our face, in a general indoor setting where there are skylights or overhead lights, or outside where we have sunlight almost always at an angle higher than our physical maximum height in relation to the horizon of the earth.  All of this means that when we see an unusual lighting pattern on our face other than what is natural and familiar to us, it highlights features of our face that we aren't used to seeing highlighted, or creates shadows that don't seem flattering because we haven't adjusted to their appearance over the many years we've come to accept the naturally occurring shadows on our face.  This is why a dramatic or creative portrait may be more flattering to the overall concept of the image, rather than what an individual might find flattering for their own personal use or interpretation.  A skilled photographer can use light to enhance or minimize certain features of your face, but you most definitely pay more for someone with that level of technical expertise and experience, versus someone who hasn't yet figured out how to manipulate light to your best benefit.

I hope this helps you understand why it is that you appear to look different in photos every single time you see them.  It's not you.. it's your brain that has been trained to see you in a certain way almost your entire life... and it's been seeing you differently than everyone else sees you all along!

How to Remove Watermarks from Photos

posted on: July 3, 2014

Honoring Veterans Flag Raising-16

Why do photographers watermark photos?

The watermark over a photo is there to protect that photo from being used inappropriately by someone who does not have permission to use or distribute the image.  This is especially important when images appear in online galleries that can be accessed without passwords, most often with services like Facebook or Pinterest, which require that you give their company full permission to use a photo anywhere and for any purposes whenever you upload an image to their site.

Without that watermark, someone may find an image of you, your children, or your product online, think it's a free google image that can be used without permission (because there's no obvious watermark or copyright info on it), and then slap it on a website or poster advertising a disease or medical condition without your knowledge or permission.  Suddenly you become the poster child for a viral disease you've never heard of, or for an organization you'd be embarrassed to be associated with. While that example may seem extreme, it's not far from the truth of what I've experienced when finding images of my clients that they'd uploaded to Facebook without watermarks, on websites for companies they'd never heard of.  If they'd uploaded an image that had been watermarked, the company probably would't have used the image on their website.


Where can you find images without watermarks?

The best place to find images to use on business websites, concert posters, or for advertising promotions is on stock websites like iStockPhotoShutterStock, or Getty Images.  You can be super focused in your keywords for finding just the right image with these stock image banks, and because the images were MADE for commercial usage, they're always sharp, eye catching, and professionally photographed without the expense of hiring a photographer for a custom project or piece.  It's a small fee for each image, but a huge peace of mind to know that know one is going to accuse you of stealing, or worse yet, send you a much more expensive bill or court date for illegal usage.

If an image is being used to illustrate editorial content or a blog post, it may qualify under most Creative Commons uses.  The best place to find free images that have a creative commons license for editorial use is on Flickr's Commons Search.  You can search by relevance, interest, or recent imagery that fits a topic or theme, and you can even define if you'd like the license to be fully public, creative commons, or ones that allow commercial usage.


OK, but how do I get a watermark removed from an image?

The only person who has legal permission to remove a watermark from an image, is the person who put the watermark on the image to begin with.  Hopefully the watermark provides information about the photographer's name or website so that you can contact them directly to see if the image can be used or purchased without a watermark.  If the watermark is too elusive to identify the creator, see if the image has copyright or creator information stored in the extended EXIF data of the image.  Once you've identified the creator of the image, send them an email with the following information when making a request for watermark removal:
  1. Email the copyright creator with the subject: Request for Image Use
  2. Include a link to where you found the image online that provides a preview of the image
  3. State how you'd like to use the image and why it's important to use this particular one (this assumes that you've already searched the stock photo agencies and flickr commons mentioned above without luck of finding anything similar that was already available for usage)
  4. Provide a sample of how the image would be used as well as what website it would appear on
  5. Ask if the image is available for use without a watermark if credit is given or if usage is paid
  6. Provide a phone number and email so that the image creator can contact you to discuss more details about the image and its usage
  7. Follow up if you don't hear back within 7 business days
  8. Assume usage is illegal or unavailable if you don't hear back within 14 business days
If you find an image on Google that doesn't have a watermark or any EXIF info, it's better to assume that it's fully copyrighted and illegal to use than to assume it's freely available.  There's nothing worse than being served with a large bill or court case just for making a bad assumption.

If you have any other questions, please leave me a comment and I'll do my best to answer them!

Discreet Photography for Private Events

posted on: May 27, 2014

In the last 3-4 years I've seen a steep increase in my everyday clients requesting additional privacy of their images for things like celebrations and family portraits.  Sometimes it's because of their political stature, occasionally for the sensitivity of celebrity guests, and most often with regular families just because they really prefer to protect their image from being shared in any way that isn't approved by them first.  I've encountered more speakeasy-style events with an intimate audience in which guests are asked to leave their phones and cameras at the door, as well as home events or private gatherings away from traditional public access to keep the atmosphere secluded.  Many people want to focus on having fun, but still want some great photos to remember the event by, so they hire a photographer who helps put their guests at ease and provides private access to images, but rarely do they consider all the ways in which we can protect their privacy.  Read on to learn about the many ways you can protect your image privacy online.

Garbo_Dreams_Web_2014-24

As much as I appear to share openly on Instagram, Twitter, or Facebook, I fully appreciate the differences between a very public life and the privacy desired in a personal life, especially when everything else about a person's life can be so public regarding their career.  People come to feel like they know me well over social media, but in reality, they're only getting the story that's curated for public consumption.  So, when clients ask to keep their images of family photos, weddings, or other personal celebrations private, I completely understand.

Hiring a professional photographer for an event can ensure greater image privacy and quality curation than working with an amateur who has no formal privacy agreement or business reputation to maintain.  Before you work with a professional, it's important to define what level of privacy is desired in advance.  If all expectations are clear and well-defined before any work begins, it will prevent any surprises or slip-ups later on.  Whether you're working with me, or another photographer, here's a check-list of questions regarding privacy protection that you might want to consider:

Online Proofing Gallery:

  • Does the photographer offer a password-protected online gallery?
  • Is the gallery publicly searchable?
  • Does the gallery require email log-in so that invited visitors can be tracked?
  • Can the proofing gallery be made available only to the client and to no one else?
  • Is it possible to make select images private while still allowing guests to see most of them?
  • Are images watermarked to provide an added layer of protection in case of a screen capture?
  • How easy does the online gallery make it to share images on social media without registration or approval?
  • Is there an option to proof in person instead of using an online gallery?

Blogging:

  • Is it important that a blog post or portfolio of images be made available to the client first before sharing in a public format? 
  • If the photographer has permission to blog some of the images, which images are OK to blog, and which are not?  For example, a private event may approve public sharing of images related to the venue, catering, decor, and flowers, as long as no images of people or faces are to be made publicly available.  This solution helps the photographer and other vendors promote their creative work, while still protecting privacy for the client.
  • If approval is given by the client to allow certain faces or moments to be shared publicly for the photographer's use and public portfolio, can any names be used with the images?  If so, first names only, last names only, or initials only?  (This is often taken into consideration most when a family has children that they are concerned about sharing publicly.)

Social Media:

  • What sites are approved for sharing the images on, and what ones are not?  This comes into play because many social media sites and image banking/sharing sites retain permissions and controls over the images once they are uploaded to that site.
  • Will images be watermarked when shared online to provide an extra layer of client and photographer protection if they go viral?  What kind of watermarking or other image protection is important and appropriate for the images that are made publicly available?
  • If an image appears to be featured on an unapproved website or format, whose responsibility is it to pursue the removal and privacy infringement of that image placement?

Image Ownership:

  • In the event of client or photographer death, who retains permission and control over the images and honoring the privacy agreement?
  • Does the client have the ability to purchase full rights to the images, sacrificing all privacy protection and control that can be offered by the photographer?


Do you see any privacy considerations missing from this list?  Let me know by leaving a comment here so others can see what you feel is important to know as well.  If you'd like me to be your discreet photographer, please visit http://anneruthmann.com to get in touch.


LOVE IT: What We Think Of You

posted on: May 16, 2014

As a portrait photographer and occasional boudoir photographer, I resonate with all of the things that a makeup artist experiences when working with other women on their image....


How important is it to be confident with what we have and honor where we are right now?  The Atlantic recently did an article on how our own self-sabatoge is affecting our ability to lead and inspire others, it's time for a change in how we approach ourselves....
The Confidence Gap:
http://www.theatlantic.com/features/archive/2014/04/the-confidence-gap/359815/

Amateur Vs. Professional Photographers

posted on: May 12, 2014

Ever wonder what the difference is between an amateur and a professional photographer?  I've seen some amateurs that have more expensive equipment than me because they think the camera is what makes images better, only to be sorely disappointed that they still get blurry and out-of-focus images after investing over $10,000 in professional equipment, rather than 10,000 hours in developing their eye and technical understanding of light, composition, and technique, which can be applied to any camera or lighting situation.  Likewise, I've seen some AMAZING work from amateur hobby or fine art photographers who dedicate a lot of time to learning the craft, but can't produce that same quality of work when forced into situations they can't control or are outside of their comfort zone, which is why they don't sell themselves as a photographer for hire, only their work as fine art after they've been able to control all the elements.

Much like a painter - we all start with the same canvas - the world around us.  We all have the same paintbrushes and tools - the cameras that are manufactured for everyone to purchase and the software anyone can use to edit the images after they've been captured.  If you were just looking at the canvas and the tools, or even the quality of work after it's been fully controlled and manipulated, you'd be hard pressed to know who's a professional and who's an amateur!  So, here are the things I've come to understand as the defining factor between professionals and amateurs...

Cambridge_Boat_Club-1765


1. Free Without Expectation, or Paid to Produce On Deadline?
The most obvious difference between an amateur and professional is whether they charge for the work they produce and whether people are actually willing to pay what they charge for what they produce.  It seems like such a simple and no-brainer distinction, but the fact is that once people have taken payment to produce something requested by another person, there's a professional responsibility and code of ethics that must be acknowledged and upheld in order to honor that commitment, or the pro takes a hit to future business and referrals.  An amateur doesn't need to honor any commitments when they aren't being paid, and they have the freedom to do whatever they want without worrying about whether they got the right shot, did the work well, or delivered according to a promised deadline or standard.  There's a lot of freedom in not collecting a fee for your work, because once a fee is collected, so are someone else's expectations and professional requirements.

Cambridge_Boat_Club-1397

2. Knowing What Tools Are Right for The Job
An amateur photographer uses the equipment they have, because it's what they have.  A professional knows when a job or request will require more equipment, skills, or technical expertise than they have or can offer alone, so they are more likely to rent equipment when they need it rather than owning a bunch of things they don't need for every shoot, hire extra help when they need it, and outsource when they know that it will create a much better result than they have skills to create on their own.  It's also the difference between knowing why a $30,000 camera is worth it for one job, but excessive for another job that would be much better suited to a $3,000 camera, and why you might use a filter on a lens for one shot before it's taken but do filtering afterward in photoshop for another shot after it's taken.

Cambridge_Boat_Club-1743

3. Knowing How to Use the Tools For The Best Results
Many amateurs don't actually take the time to read their camera manual and understand everything their camera can and can't do.  An amateur tends to shoot in one way and not think about any of the technical choices involved in why it might be better to shoot differently.  For example, using a camera in full-auto and allowing the camera to make automatic but unskilled decisions that may lead to mediocre or missed results, rather than selectively choosing when it would be best to have more control by using manual, aperture priority, shutter priority, or bulb.  The same goes with lens choices.  An amateur will often be satisfied with a kit lens because it covers the majority of their needs, rather than understanding why you might want a 50mm prime lens for some things, or a lens that can zoom across its full range at f/2.8.

Cambridge_Boat_Club-1616

4. Getting The RIGHT Shot, Not Just ANY Shot
Amateurs are often satisfied with first or second look at a subject and tend to have an "I already got it" mentality after taking a photo, where a professional might take 10 shots an amateur would be satisfied with just to get one image that a professional would be satisfied with.  An amateur will quickly move on to the next pretty thing, while a professional might obsess over making the shot better until they're satisfied or absolutely must move on for the sake of time.  An amateur will be happy with all images captured from a basic level or position with whatever light and background are already there, where a professional will carefully choose their angles, background, framing, composition, and lighting for their subject.  Most amateurs don't have the patience to wait for a better shot to happen, while a professional can sense in advance that there may actually be a slightly better moment, expression, or lighting situation if they just take a little more time and patience to explore the scene in front of them.

Cambridge_Boat_Club-1398

5. Editing Is Everything
An amateur is often happy with 80-90% of the images they've taken because they shot it as they saw it and they're satisfied with what they saw to begin with.  A professional is often happy with about 10-25% of what they've taken because they saw it one way, then another way, then another way, and finally the way they really thought was best.  An amateur will share so much more of their work because it's not about how they saw it, it's about what they saw, where a professional will carve down everything they saw to the very best way of seeing it.  An amateur may be happy to throw a quick and easy action or filter on everything, whereas a professional is going to take the time to adjust more than what a filter can do until the image is its best possible representation of the image according to the professional's eye and style.

Cambridge_Boat_Club-1404

6. Backups, Storage, and Insurance
When someone doesn't collect money for the work they produce for others, there's no expectation that they'd need to backup their work, store it for any length of time after it's beed delivered, or have on-site equipment backups or insurance in case something goes wrong while they're shooting.  There's also no expectation that they'll correct any errors, or provide a reshoot if the shoot just wasn't right the first time.  A professional is paid because they are expected to deliver no matter what the conditions are, and no matter what curve balls are thrown at them.  If one camera stops working, they have another to the rescue.  If one battery fails, they have several others to get them through the rest of the day.  If they break a leg before an event, they have backup photographers on call that will fill in for them so their client isn't left high and dry.  A professional has a contract and honors it, while an amateur doesn't need to honor anything because there's no risk or reward involved except personal fulfillment.

Hopefully this helps outline some of the major differences between an amateur and professional photographer.  Is there anything I left out?  What do you think is the difference between an amateur and pro?  Leave your thoughts in the comments!

Why I Don't Photograph My Family's Weddings

posted on: April 21, 2014

wedding guests with cameras up to faces
I have somewhere in the area of 30 cousins, many who have yet to get engaged or be married (if they choose to)- it seems like I, the professional photographer in the family, would be a natural fit to photograph their weddings, right?

It's easy to think that hiring a family member to photograph a wedding would be a natural fit and a smart choice, especially since you're doing family a favor by giving them business.  I would even say that this would be a smart choice if your family members are dress makers, florists, bakers, or maybe even ceremony musicians.  Those are all jobs that can easily be done before the wedding, or at the wedding in ways that don't necessarily detract from the family member doing their job well, while also enjoying the opportunity to see other family members during a special occasion.  Wedding photography, however, is quite different.

Why Lie, It's For Beer
As a wedding photographer, I need to have a dedicated and objective eye on everything that's happening around me.  Moments are happening out of all corners of the room and I am there to capture them and preserve them for the couple and the families.  When I'm surrounded by family I know and people who haven't seen me in a while, they often want to catch up with me, which distracts me from the job at hand.  Naturally, I want to catch up with them too- but then I'm not paying attention to what's happening in front of me.  It's also really difficult to ignore someone who can call out your name from across the room to capture a photo of them, when really the most important thing happening is somewhere completely different in the room, but could easily be missed when being pulled in different directions by people who are comfortable making additional personal requests for themselves, because you're family and they just expect it.


When there's a family connection with the people at the wedding, there's a tendency to focus on and capture the people we are most familiar with, rather than remaining completely objective to both families and observing them all as unique and interesting in their relationships to each other as well as the couple.  I figured this out early on when I was just a guest at weddings and noticed that all of my images centered on one side of the family that I knew best as well as the friends I was most familiar with, almost excluding everyone from the other side of the family at the wedding.  It was much easier to be objective at friend's weddings than it was at family weddings.  Likewise, when couples have shared photos from friends & family that were taken at their weddings while I was the professional, I noticed the same tendency over and over, to only document the people that were most familiar to them.

silly family wedding portrait
When I'm a hired as an outside professional, I have the most objective view of all the relationships and important people in the room, and can approach both sides of the family with the same level of attention and dedication.  I can take in the silly quirks of family members and document them instead of rolling my eyes and walking away because I've already seen them behave that way a million times before at other family events.  I can appreciate the over-attentive aunt instead of being frustrated by her desire to make everything perfect.  I can delight in a kid's antics instead of scolding or correcting him as a family member.  I can just observe, document, and be present, rather than judging or assuming things that I may or may not already know.  Point blank, I can provide the best service and coverage possible when I can remain objective and be held accountable to a professional standard.

slingshot boy at wedding

If you know someone who is considering a family member to document their wedding, please share these insights with them.  I want them to have the best wedding photography experience possible, and avoid making any mistakes that they might regret in the future.  To all of my family members who I've had to say no to, please understand that I'm looking out for you, and that I may still bring my camera and shoot what I can with one lens and no flash so that I don't disrupt the professional images being captured, but that it's nearly impossible to be "on my game" when being distracted by our family members!

The Secrets to Finding An Amazing Wedding Photographer

posted on: April 14, 2014

Looking Glass
There are SO MANY wedding photographers to choose from, aren't there?!  I would be so overwhelmed if I had to pick a wedding photographer now.  I thought it was overwhelming 10 years ago, but technology has made the market so much bigger with so many more inexperienced people just creating a website and giving it a try.  I know I can't possibly serve everyone as a wedding photographer, but I can at least share some insider secrets about the wedding photography industry that might help YOU find a really great and experienced photographer for your wedding.  Here's some insider knowledge on where the most amazing wedding photographers can be found, and how to find the ones who are near you...

Glocester Lighthouse Engagement

Word of Mouth Referrals:

Talk to 5 recently married couples about their wedding photography experience and what they wish they did differently as well as who they'd recommend working with.  It's important to talk to married  couples, since an engaged couple who has selected their vendors hasn't really gone through the full experience and delivery process yet.  If someone is highly recommending a photographer you haven't seen anywhere else, it's probably because that photographer is awesome at what they do and they don't need to advertise.  Some of the best photographers simply cannot be found in traditional wedding websites and directories because they already have enough business from referrals that they don't need to put themselves out there in any other way. I know many amazing photographers who have really old websites and don't advertise anywhere because they spend all of their time serving clients rather than working on their online presence.  (I'm equally guilty of this!)  The best people to get word of mouth referrals from are other recently married couples, independent wedding planners, and venue coordinators at your favorite venues*.

*BEWARE of the Venue Vendor List:

Before blindly accepting a vendor list from a venue coordinator, ASK if the venue coordinator has actually worked with AND recommends the people on their vendor list, or if it's just a list that people pay to be on.  I've talked to many venue coordinators who say they'd never actually recommend the people on the list they hand out blindly to couples in their venue packets!!  It makes me cringe to think there are coordinators who are not providing quality referrals just because they're receiving a kick-back or commission to share names of people who want to work at their venue.  A great venue coordinator will be honest about this and give you some handwritten referrals that might not even be on their list.  Just know that paying to be on lists is a common practice in our industry and by taking the time to ask for a personal recommendation, you will get better results than assuming a list is handpicked to begin with.  If they can't give you any personal recommendations, than they may not have been working in the wedding industry for very long. Unfortunately, due to the stress and long hours of the event industry, there's often a high turnover in venue coordinators- so take note of their personal experience level as well.

Punta Cana Destination Wedding Night Portraits

Pre-Screened Professional Wedding Photography Organizations:

If you don't have enough personal referrals, this is often the second best place to find photographers who are highly qualified and produce amazing work as wedding photographers, but who aren't advertising or paying to show up on highly visible wedding websites.  Some of these professional photography websites can even help you find photographers in your local area to help narrow your search.  I've been on and off these sites depending on how much time I have to accept non-referral inquiries and how much I want my photography work to be seen.  When I'm really busy, I pull back from contest sites and professional organizations, but I love participating in them and getting accolades for my work when I have the time to invest in preparing for a contest.  There is a small caution in only using these sites: while someone may have amazing photography work and win awards from other photographers, you still need to check that couples have had great experiences working with them.  Some amazing artists aren't the best business people, so definitely go the extra mile to get references from previous clients if you decide to go with an award-winning photographer.  Here are my favorite places to find award-winning wedding photographers who are pre-screened for high-quality imagery before ever being accepted into the organizations:

jennijarin1.jpg

REAL weddings in LOCAL Magazines & Blogs:

Do yourself a favor and skip the national magazines and blogs.  It's frustrating to look at a big list of people who might not even be in your area, or who you'd have to pay extra travel expenses for.  Go straight to your local magazines and blogs, but skip their vendor directory where people pay to be featured (no matter how long they've been in business or if they're a good photographer), and head instead to the REAL weddings section for your local area.  Look at the names hidden in the crease of that magazine or under the headline of that article, look for the photographer credit on that blog post.  Once you're armed with some names of photographers who have been featured in magazines and blogs, check out their reviews on Wedding Wire, Yelp, or Pictage to see what other clients have said about working with them.  If they have no reviews, don't assume anything is wrong, just ask them to share references with you.  I've worked with hundreds of couples and only half of everyone I ask for a review actually ends up getting around to leaving one- but if people never ask for reviews at all, and their couples are perfectly happy, they may never get reviewed.

Hopefully these industry insider tips help you find the most amazing photographers who aren't paying to advertise in the directories, who aren't doing wedding shows, and who are otherwise very difficult to find online or in print.  This isn't to say that anyone who pays to be in a directory or does a wedding show isn't a great photographer, only that there are a lot of amazing artists who hide out from the public eye and take a little more sleuthing to find!  I wish you the best in your search for an amazing photographer, and if you found this post to be useful, please share it with other engaged couples who would appreciate getting the inside scoop as well. ;-)

Divorced? Don't Toss Your Wedding Photos!

posted on: April 8, 2014

While it's perfectly understandable why someone might want to toss wedding photos and everything else that represents an ex-relationship, I would like to invite you to consider all of the other amazing sentimental moments that only occur on a wedding day and should be preserved even if you don't have children to pass wedding images onto...

Father/Daughter and Mother/Son Dance:
For many people, their wedding day is the only time in their lives that they dance with one of their parents.  This is often an incredibly meaningful moment between a parent and child, and it may never happen again, so definitely save and print these for archival purposes.
IMG_3098.jpgIMG_3162.jpg

Elders & Extended Relatives:
Weddings may be the only time that we get to connect with distant parts of our family, and if they're older than we never know when or if we'll see them again, so it's best to preserve these images in the event that one day it's the only tangible memory you have of them.
IMG_3194.jpg

Siblings, Cousins, & Friends Looking Amazing:
You probably have a few family members or friends who ONLY get dressed up for a wedding day, and the images from your wedding may be the only proof that they've ever worn something nicer than jeans in their lifetime.  Why not give them a copy to help them see how good they look when they put some effort into it?
IMG_3193.jpgIMG_2800.jpg

Social Proof:
That your dad can dance, that your cousin really can crack a smile and laugh, that your aunt can make a killer floral arrangement, that your best friend has lost so much weight, or that little Sam made it through an entire day without a total meltdown.  There are subtle clues in your wedding images that can help people remember who they are or how far they've come, and can provide a great pick-me-up when they're feeling down.
IMG_2950.jpg
IMG_3173.jpg

Memorials:
Another way that wedding images are also used fairly often is for funerals.  When no other great photo of a person exists, there may be an awesome image of them from the wedding, looking their best and enjoying themselves, which is how so many people like to remember their loved ones.

When you consider how many meaningful and joyful moments unfold on a wedding day outside of the ceremony itself, it makes the images that much more important to invest in and hold onto like any other significant investment you make in your lifetime.  Please print what's important to you because technology changes and fails quickly, but archival photographs survive many generations.  If you know of someone who's dealing with a divorce or separation right now, please share this list to help them appreciate the investment they made in the event that brought their closest friends and family together in celebration.

*Sincere thanks to my sisters who have held onto their weddings photos and allowed me to share some here. ;-)


What Headshot Background Should I Have?

posted on: March 31, 2014

The background for your headshot or portrait helps to establish a mood and atmosphere that provides subtle suggestions about you, your work, and your style.  To help you decide which background would be best for you, here are a few things to take into consideration:

How Will Your Portrait Be Used Most Often?

Does this photo need to blend into a website, conference poster, online directory, or anything else which requires a standardized look?  If so, white or plain colored are backdrops often used to create a consistent look on a website or in a directory of other professionals.  If you already have a website that your image needs to be standardized with, it would be good to share the site in advance with your photographer so that they can also choose the appropriate lighting for you and your background.  Lighting alone can be used to create a mood and feeling for your portrait, and it's important that this lighting be carefully considered by a professional when using a plain background.

Does this photo need to quickly and clearly communicate something about the person or an  experience or feeling that isn't directly apparent otherwise?  If so, carefully choosing an environmental background is going to be the fastest method to communicate an intent most clearly to the viewer.  Magazines, news publications, and small business websites often benefit most from portraits that provide more context and information about the person in the portrait, so that the image itself can tell a story about a person before any further information is given.

Health Coach Headshot - DawnKelli's Headshot


Environmental Background:

Benefits: Environmental portraits can be taken indoors, outdoors, during the day, or at night and help provide a context, situation, or scenario that the viewer can identify with beyond making assumptions from hairstyle and clothing alone.  For example, showing a female in a workout outfit on white might suggest a studio yoga instructor to one person or a runner to another, but putting her in the context of a gym with weights will help more clearly identify her as a personal trainer.  Seeing a man in a suit on a grey background might suggest a general business person, but when photographed in the context of a courtroom or library can more easily suggest a lawyer.  A happy face in an urban environment suggests something different than a happy face in a beach environment.  Subtle clues are provided by environmental context that can help a portrait more clearly and easily communicate a role, career, or context for working with someone that cannot be easily achieved with plain backgrounds in the studio, which is why environmental backgrounds are often used in magazine and news contexts.  Environmental backgrounds can be found anywhere and allow for a variety of lighting methods.

Drawbacks: Not all environments are ideal for photography and some may produce distracting elements that take the attention off of the portrait if not photographed carefully.  It's important to work with an experienced professional who can carefully craft an image in an environment that keeps the attention focused on the portrait itself while still using the background as a true secondary element in the image.  This is the easiest type of portrait for many people to take, but the hardest to make look professional if you don't know the subtleties and art of portrait photography.

Where It Shows Up Most: Editorial magazine features, newspaper articles, small business portraits, modeling portfolios, executive portraits, and actor headshots.

Suburbia Headshots for UML Off Broadway Players

Marta Sinclair - Author Headshot


Plain Colored Background:

Benefits: Colored backgrounds can help suggest a mood without suggesting a specific context, and can be used to help highlight and flatter different skin/eye/hair tones in a portrait.  Color psychology can be applied to help attract the right audience or generate desired feelings about the person in the portrait.  A colored background creates a natural frame around an image that is less likely to blend into the white page of a magazine or online article.  A wide variety of lighting techniques can be used to achieve a great portrait against a colored background.

Drawbacks: Colors can often be tied to certain periods of time and may help date the image over time (but this is no more dramatic than hairstyles and clothing).  Colors can repel certain people as easily as they attract others.  Clothing choices may need to be chosen carefully to avoid blending or clashing with a background color.

Where It Shows Up Most: Fashion advertising, actor headshots, modeling portfolios, small business portraits, corporate headshots, and printed directories.

Singer Headshot - Sara

College_Student_Headshots

Doug Personal Lifestyle Portrait


High Key White Background:

Benefits: A completely clean white background can be versatile in many different contexts and helps keep the attention of the image focused completely on the person being photographed.  A true white background can create a borderless look when placed on a white page in websites, conference booklets, annual reports, and presentation posters.  If used against a dark page or background, the high key white will help the headshot pop off the page by creating a high contrast and brightness point to draw the eye.  High key white offers the most consistency when paired with other high key white portraits photographed by different photographers or at different times..

Drawbacks: Portrait may come across as sterile or institutional due to the lack of context.  Provides no additional mood or clues for the viewer.  May create a surreal "floating head" effect if used the wrong way on a white page.  May require additional lighting on location or studio expenses to achieve the high-key look.

Where It Shows Up Most: Stock photography, corporate portraits, and online directories.

Citi Center HeadshotCiti Center Headshot

Get The Best Profile Photo Possible

posted on: March 26, 2014

As a photographer, I'm always aiming to create images that help people sell themselves or their product online.  I love that Photo Feeler, a site for testing your profile photo against the metrics identified below, recently did a study on how different elements of a photo help or hurt your chances (see info graphic following).  I know that I've experienced the effects of a good or bad photo online when being chosen to be hired for a job and especially in the online dating world where all you get is a 2D image and a bit of text to make a decision to meet someone in person or not!  Whether we like it or not, our online image is often the first impression that people have of us, and sometimes it's the only impression they get if that impression isn't favorable right off the bat!  If you see that your profile pic suffers from some of the drawbacks researched below and you haven't been able to nail it on your own, get in touch with me to schedule a profile photo update soon!  If I can't help you, I'll help you find someone who can!

The Perfect Profile Photo Infographic

How to Create a Large Group Photo of All Guests at Wedding

posted on: March 20, 2014

Large Group Wedding Photo 7

If I could only do one posed photo during a wedding, I'd want it to be a large group shot of all the guests.  After all, celebrating with the friends and family who love and support your marriage is the whole reason for having a wedding and not just running to city hall for a marriage license!  That being said, a large group shot of all the guests is often one of the most challenging images to create on the wedding day without turning it into a huge production- but after doing it for so many of my wedding couples, I can definitely say that there are several ways to make it easier and low-stress for everyone involved.

1. Decide on a Time & Location When Guests Are Already Gathered Together
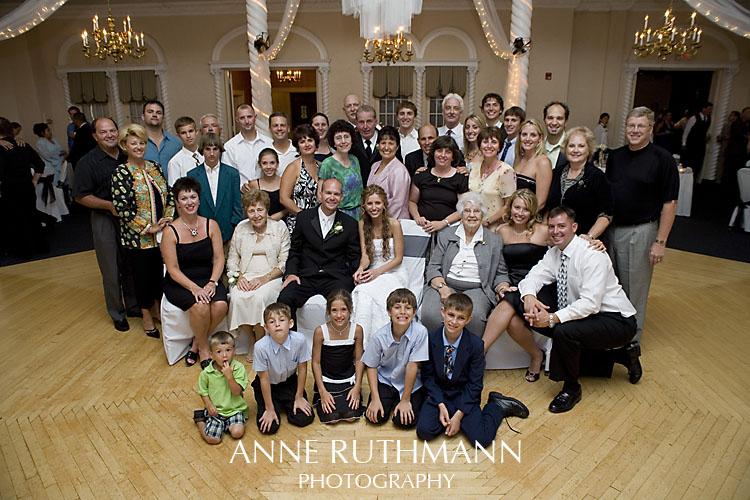
Often, the most ideal time is immediately after the ceremony has ended, but before people have started to leave.  While I have done arrangements during the reception that involved everyone crowding on the dance floor, or going outside to get a shot from a balcony, by far the most convenient arrangement is getting people right after the ceremony.

Large Group Wedding Photo 5

2. Find a High Point To Shoot From, Tiered Steps, or a Natural Slope for Gathering Guests
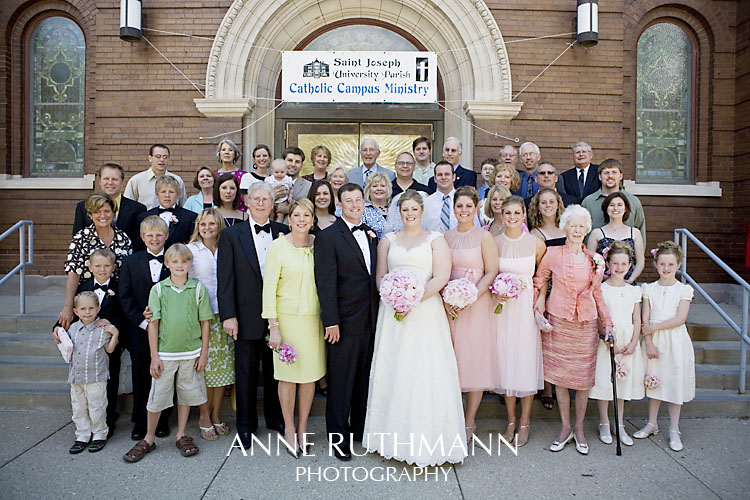
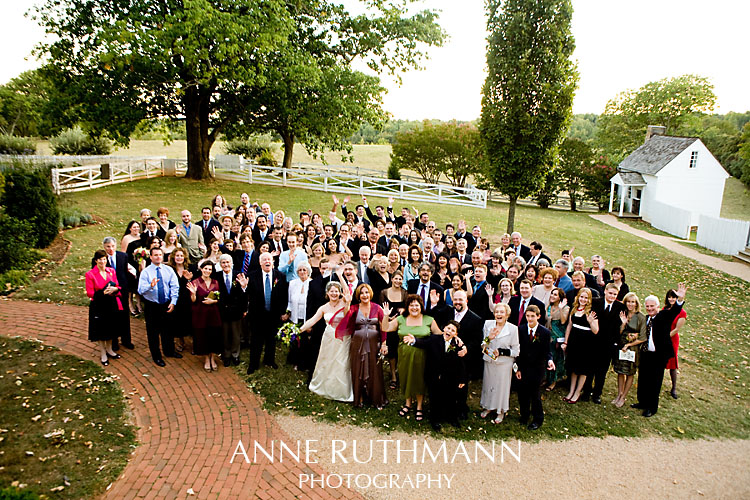
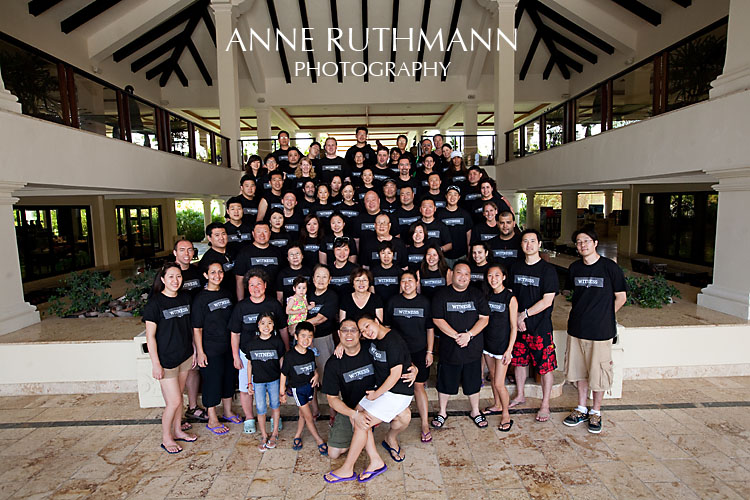
The absolute easiest arrangement is shooting from a balcony at the back of a church or hotel ballroom and simply asking the guests to turn around and look up at the photographer.  The second easiest option is asking guests to file out onto the steps of a natural exit point from the ceremony.  The most chaotic, but possible in a pinch, is asking guests to move to a completely different location together where there's a natural slope in a hill, or where the photographer can get a higher vantage point with a ladder over flat ground.  The more traveling and set-up involved means additional time for chaos to ensue before the image can be created, and the more chaotic it gets, the harder it is to rein it back in.

Large Group Wedding Photo 4

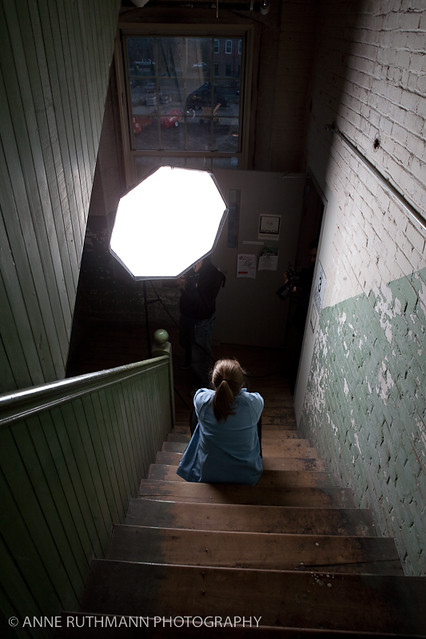
3. Decide How It Will Be Lit
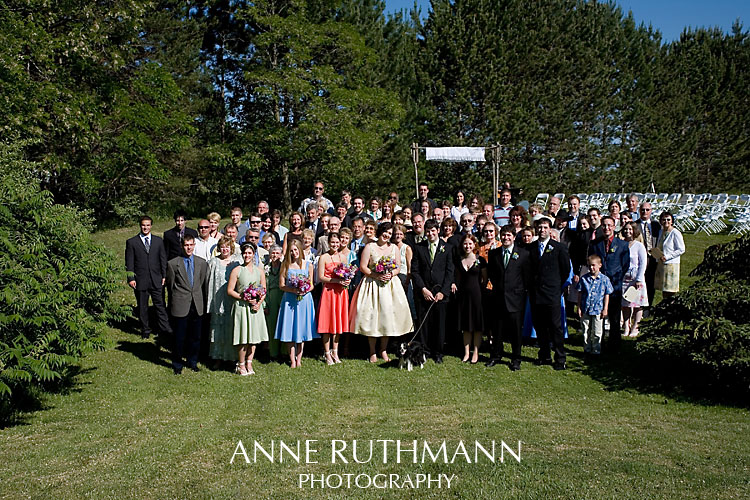
Lighting is often figured out after the location is selected because we have more viable lighting options than we do location options.  However, in the case of an outdoor image, you need to be aware of any surrounding trees that might create dappled light and whether the guests could be looking into the sun or if they'll be in full shade.  If the set-up is indoors, is there a ceiling that a flash can be bounced off of to help spread a small flash?  Is the room lighting sufficient, or can it be turned all the way up by a lighting tech person after the ceremony has finished to help with the group shot?  Will any additional lights need to be set up in advance to cover the crowd?  A professional photographer will know and understand how to light this group shot in advance.

4. Prepare Guests With An Announcement Before It Happens
While an announcement in your wedding program is a nice way to prepare guests for this super awesome group shot, it's best if the wedding officiant can make an announcement with basic instructions about what to do before the couple actually walks down the aisle at the end of the ceremony.

Large Group Wedding Photo 1

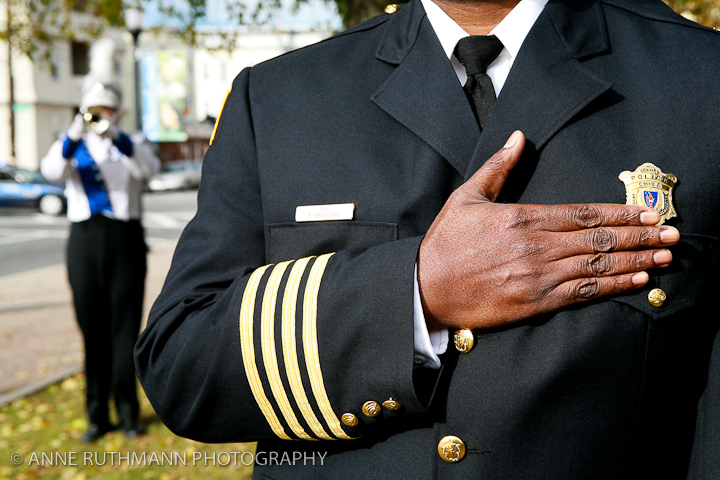
5. Get Important People In Front
The couple, the wedding party, and the immediate family should all be in the front row of the image so that they take center stage in the image and don't get lost in the large crowd of guests.  This is often facilitated by simply having the couple, wedding party, and family members exit at the end of the ceremony as they normally would, and then return to the room at the back or file at the front of the steps with room for people to fill in behind them.

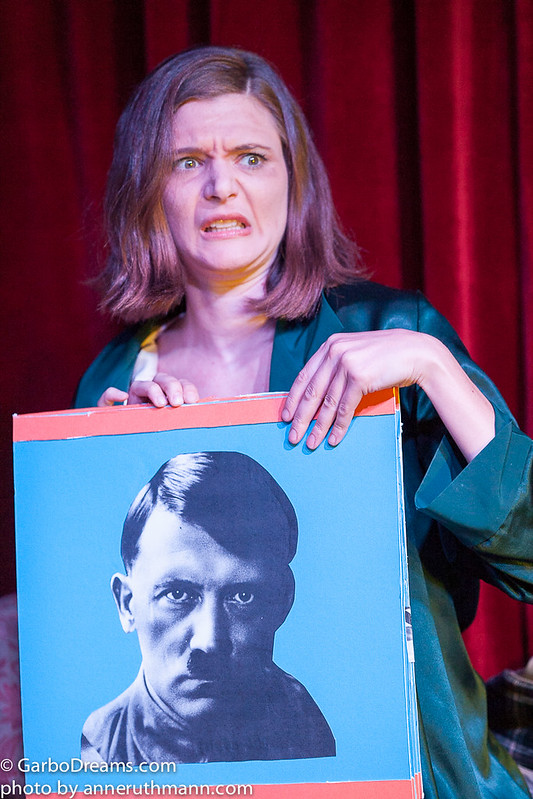
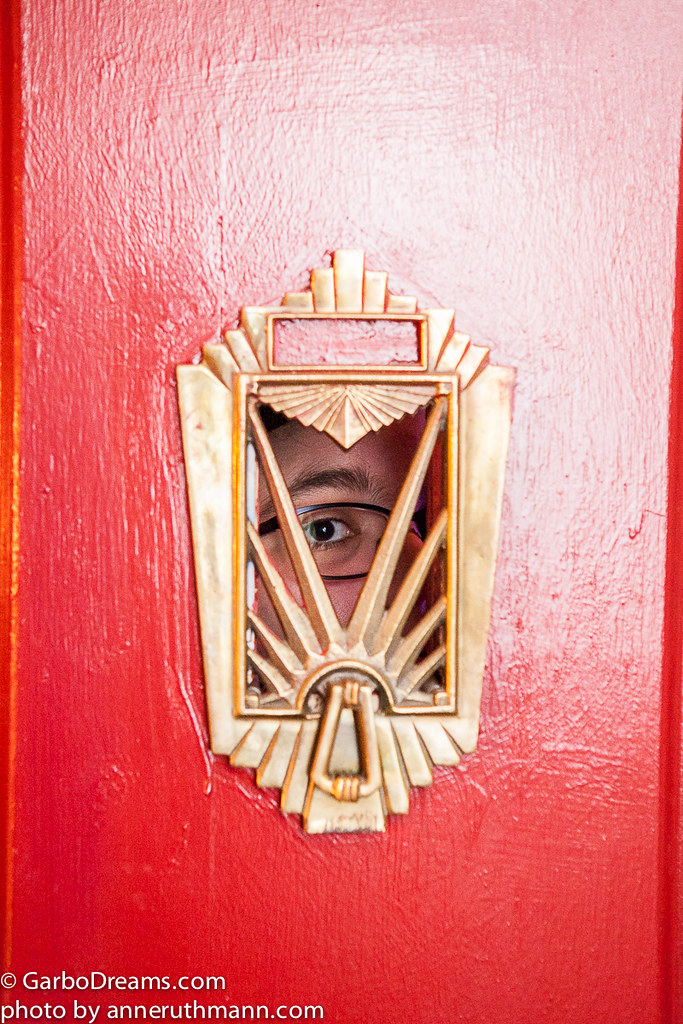
6. Check for Hidden Faces
Some people assume that if they can see the photographer with one eye, the photographer can see their whole face.  That might work for peek-a-boo, but not for this group shot.  Short people hidden in back rows or behind taller people can either easily be asked to move to the outside edge of the very same row, or to the front with little hassle to the rest of the crowd.  If you have time and space to ask tall people to move to the back, that's another quick and effective way to sort the crowd since most of those people know who they are and have been moving to the back row since middle-school (I'm a back-row regular myself.)

Large Group Wedding Photo 2

7. Encourage Everyone to Move In Closer Together
Our natural tendency is to have some personal space around us, but that makes for very sloppy looking group photos, especially when it's such a large group of people.  I've found that by asking guests to give the couple a group hug by getting as close as possible to their neighbor, reminding them that everyone is friends and family here, they become a little more willing to relax their personal space barriers and guards against being shoulder to shoulder with other people.

8. Count Down but Shoot On Every Count
A count down (3...2...1...) is nice for people who are sensitive to light, people who have a tendency to blink a lot, or just for letting people know that you actually need them to pay attention.  However, one of my secret moves is that I actually start shooting on 2 and I keep shooting after the final count.  It's best to prepare guests in advance by telling them that you're going to take multiple attempts at the group so that they don't start to disperse after just one count down.  Two or three count downs are generally all that's needed if multiple images are snapped during each count down.  Another body language clue to keep in mind and help the crowd understand that you're not done yet is keeping the camera up to your face rather than bringing it down to preview the shot.

Large Group Wedding Photo 6

9. Remember that Perfection is Impossible
There is nothing perfect about humanity, and when you put a large group of humans together, you're going to get a lot of imperfection.  You may take over 20 images of that large group and every single one will have something wrong with it regarding a person who isn't looking at the camera, someone important who blinked, or that awkward moment when someone opened their mouth to say something to the person next to them.  While there is PhotoShop when absolutely necessary, only so much swapping of heads, mouths, and eyes can be reasonably expected before you end up with a group of people who look like science experiments.  It's better to simply allow for a certain amount of imperfection and reality, rather than expecting something that isn't humanly possible.

Quick Summary of Tips:

Organizing:
- Decide how many rows of people you’ll have
- Decide how many people that places in each row (estimate 2ft for each person)
- Decide how you’ll be elevated or they’ll be stacked or standing/kneeling/sitting to see all faces
- Decide what kind of pose is most appropriate based on the use of the photo (for example, don’t have professionals in dresses sitting on the ground, but families in casual or sport clothing may be OK)
- Decide who needs to appear in the front row or most visible row for priority reasons
- Decide how you’ll get tall people to the back and short people to the front
- Make sure the group won’t be looking into the sun, or you’ll get squinty eyes
- Some people may have transition lenses that look like sunglasses, talk about this with the client in advance and find out how they feel about not people looking like they’re wearing sunglasses
- Confirm the details of the group shot with any coordinators or organizers for the day so they can help
- Speak loudly and remind everyone to look at you

Technical:
- Make sure your aperture is at least F/8 and focused in the second row of people
- Make sure your shutter is at least 1/80th or faster of a second to avoid blur from movement
- 24mm Lens should be enough lens width if you have enough room, if you were in a small room or space you’d go wider, if you were shooting from a field into grandstands, you'd go tighter
- Take a ridiculous number of frames
- Count down between shots but keep shooting in between counts

Did you appreciate these tips?  Do you have any other questions?  Let me know by leaving a comment!

Photo Tip: Using a Tilt-Shift Lens on Washington Square

posted on: March 11, 2014

One of my favorites images from this weekend was tilting the focal plane to focus all the way up 5th Ave from Washington Square....
Washington_Square_Winter-5050-2
(I don't do many art prints, but I love this one so much that if you'd like a copy, contact me with the size you'd like and I'll send you a paypal invoice for your own special edition signed print. ;-))

Washington_Square_Winter-5056

The Tilt-Shift lens was originally designed to simulate what a bellows can do on a large format camera, which has historically been used most often in architectural photography, but with DSLRs this technique has also gained popularity for use as special effect photography, like miniaturizing a scene from above with a shallow plane of focus not usually possible at such focal distances.

Washington_Square_Winter-5047

If you haven't used a Tilt-Shift lens before, here are some basic tips of how you might use it:

What Does Shifting Do?
The "Shift" allows the camera to get a vantage point higher and lower, or further right and left than the actual camera position, without moving the camera.  This is great for when you're at the top of your tri-pod but just need a little extra vantage point, or you're on a rooftop and need your vantage point to be just a little lower without hanging your camera from a ledge.  It's also ideal for creating panoramic images when shifting from side to side and stitching together later without needing to do any additional barrel distortion corrections, because it's basically just adding width to either end of the lens.  This can also help in situations where there's street traffic in front of a building, you can shift your vantage point up to basically eliminate it from the frame without cutting off the bottom of the building.

What Does Tilting Do?
The tilt's main objective is to tilt the focal plane from being parallel to the sensor, to being at an angle from the sensor.  At the extremes of the tilt spectrum, you can end up with a thin line of focus to infinity in just one slice of your image at a much lower f-stop than is possible without a tilt lens.  Most often now the tilt function is used to blur distracting elements that would normally fall on the same plane as a subject, or create the miniature images from focal distances that generally don't make a shallow depth of field possible.  The images in this post and yesterday's were mostly using the Tilt function to create different planes of focus.

Can You Tilt and Shift at the Same Time?
While it's possible to both Tilt and Shift at the same time, the results really aren't going to be as great as if you're just using one function rather than both at the same time because with every exaggerated movement, you're also creating more distortion in the image and letting more light into the camera.  There's a little metal button on the side of the lens that you push to spin the lens element into portrait or landscape mode depending on how you want to tilt or shift the lens- you can even tilt or shift at a diagonal if you'd like, and the lens element will lock the lens in where you'd like.

How Do You Focus a TS Lens?
Because of the mechanics of the lens, there's no auto-focus capability.  You must manually focus the lens and use your eye as a gauge for sharpness with confirmation from your camera's AF points.  Unlike other lenses, you can generally see what's going to be in focus right in the lens, however it can be slightly difficult to distinguish exactly how much will be on the plane of focus depending on your aperture, which is why you should know your focal length math for greatest accuracy.

How Do You Get Accurate Exposures with a TS Lens?
Anytime you tilt or shift the lens, there are light leaks into the lens and the sensor, which means that your camera's meter won't read correctly when you're shifted or tilted.  You can get the closest exposure with your in-camera light meter when the tilt and the shift are set to "0" on the lens- at which point you would set your exposure settings in Manual mode before tilting or shifting to retain proper exposure.

What TS Lens Focal Length Should I Use?
Tilt-Shift lenses only come in prime focal lengths due to the mechanical structure, so if you're going to be using one, you'll need to choose the best focal length for your needs.  The images I've shared here are all from a Canon 45mm TS-E lens which works best if you have some distance between you and your subject, or are using it for more street photography, full size portraits, or product photography.  I've used this lens to get all the flowers down the aisle of a dark church in focus at f/2.8, but it's not wide enough to photograph the Chrysler building when you're on the same street.  The 17mm would be the ideal lens for dramatic sweeping landscape images or shooting ridiculously tall buildings from one street away, the 24mm would be great for interior architecture or photographing smaller buildings and exteriors like homes, and the 90mm would be best for macro or small product photography.  One tip for finding images taken with a particular lens is to search the Flickr catalog of images by the lens name.  There's often either a group dedicated to featuring the lens, or the lens info will show up in the EXIF metadata of images.

Want a little more explanation?  Here are some decent YouTube videos on the topic:

Demonstration of using the Tilt-Shift Lens:

Demonstration of creating a DIY bellows for Tilt-Shift effect:

Popular Posts

Ask Anne All rights reserved © Blog Milk Powered by Blogger