Norwegian Winter & Viking Stave Churches - Travel Log

posted on: February 6, 2017

I had set out from Bergen, Norway to attempt to capture Northern Lights and the historic Stave Churches of the 12th Century.  I had been monitoring the aurora activity and my timing aligned with an active sun spot known to produced geomagnetic events full of beautiful multicolored auroras.  I knew that I might be too far south, and that the weather might be too cloudy to get the results I was hoping for, and yet I was dedicated to making the most of whatever conditions were presented to me along the journey...


What nature provided was cold, wet, foggy, and alternating between sleet and snow during my drive.  The roads were slippery, which meant going half speed around winding mountainsides and feeling like I might never reach my destination before I'd have to turn back.

I drove for nearly 24 hours straight through the inner rural land of Norway.  I found myself hypnotized by the long mountain tunnel lights with little more to look at than the passing of florescent beams overhead and grey mountain tunnel walls.  The only people I encountered were tunnel workers, ferry workers, and the restaurant staff at AEgir Brewpub Flamsbrygga who provided a welcome respite from the dark winter isolation that comes with venturing off alone into the country when others stay cozy in their fireside homes.

In an attempt to get above the cloud line, I drove up two different mountainsides.  The first time near the town of FlÃ¥m, resulted in my car being stuck in 2ft of snow as the depth of the ground under the snow cover did not match the rest of the road.  I was alone on the side of a mountain with no shovel and no help.  Just me, the bitter mountainside wind, and two right side tires lodged into deep snow.  No cell service, no wifi.  The closest home I could see if I needed to knock on the door was at least a mile down the side of the mountain on icy road.  After a significant amount of shoveling with my boots and rocking the car back and forth to pack the snow for greater traction, I did get that car unstuck and made it safely back down the mountain.  Despite this setback, I was still determined to see if another mountain top opportunity allowed for clear sky views.  The cloud cover was low and made it appear as though an opening could still be found above.

In another attempt to get above the cloud line, I headed toward the Sogndal Airport which appeared to be on top of a mountain.  I thought, surely an airport road will be well-cared for to allow safe passage to the top of the mountain.  Half way up, my car stopped moving forward and started sliding backward on ice, even as my wheels spun forward.  My heart started racing- how far back would it slide before stopping?  Would I be able to control the direction of a backward moving car being pulled by gravity?  Would the rear end be stopped and potentially crushed by trees or would I miss them all and go over the mountain?  I asked spirit for help.

The car stopped.  I took a deep breath and collected myself and evaluated my options.  There was no safe place to turn around and the ice left me little promise of how much control I might have while turning.  Either I continued to attempt forward momentum and overcome this icy stretch, or I reversed with less control.  I inched forward, slid back further, inched forward, slid back further, and then inched forward again until the tires finally caught enough traction to recover all the forward momentum I'd lost and helped me reach the top of the mountain, albeit with white knuckles and knotted stomach.  I just felt happy to be alive.

Never once did a car come from the opposite direction or from behind.  The airport was not open and no flights were due in or out until the morning.  The whole reason I endured two snowy icy mountain climbs was lost to more clouds.  The clouds were too thick to see the night sky and by this time, I could not wait hours for clouds to pass because the drive back would likely take just as much time and I needed to return the car to the city by a certain time and get some much needed rest.

Just as I was feeling completely defeated, now realizing my next task would be to safely descend the mountain's icy roads without losing control of the car, my phone started sending me alerts.  The outside world reminded me that I wasn't really alone in this moment of defeat. Apparently there was an open WiFi connection at the airport and the phone had automatically connected.  How should I take advantage of this brief moment of connection with the outside world I had along this journey?

At the very least, I could send an update to family about my circumstance and suggest how long they should wait to hear from me again before being concerned about my safety.  I updated my digital maps and GPS orientation, viewed the roads I might take back and what different challenges they might present.  I figured out how tell the tunnel roads apart from the regular roads on the map to avoid the many tunnels that made it difficult to stay awake and focused on the road.  I checked the satellite cloud cover movement and reached resolve that I would not see Northern Lights on this trip.  That resolution also gave me the renewed drive to widen my focus from being so narrow and capture what normally would not be available in more ideal conditions.

The trip back down the mountain unfolded with much more control.  I stayed slow and measured, never letting gravity control the car so that the tires could always grip some part of the road and ice.  Slow and steady.  Meter by meter.  Safely back to flat ground and to finish the rest of this journey, embracing more of what nature would allow in the conditions provided, rather than what my humanistic determination would seek to force upon nature.  I was grateful I was safe, still had plenty of gas, working heat in the car, and renewed alertness to continue moving forward now 14 hours into my journey into rural Norwegian winter.

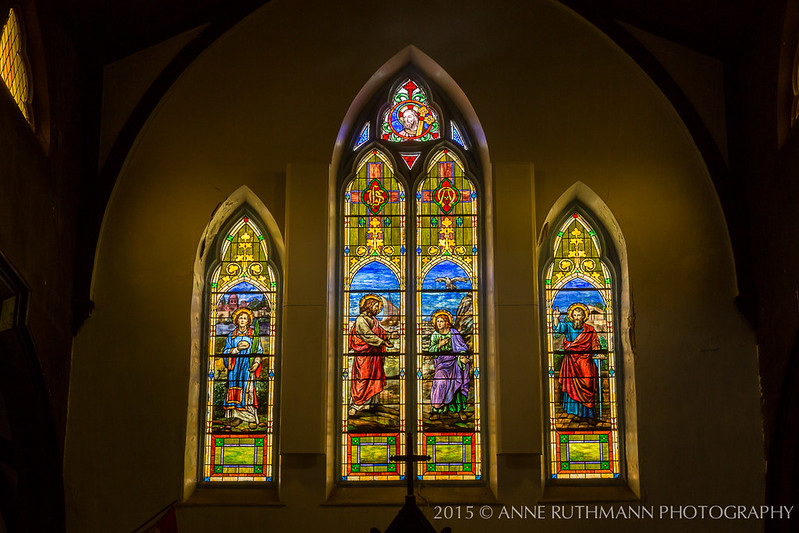
Having fully accepted that Northern Lights would likely not be possible, I turned my attention to the Stave Churches along my path, preserved and occasionally reconstructed faithfully by modern architects and historic preservationists.  Anything I could get of a few Stave Churches would be better than returning empty handed without images to show for all the effort and problem solving I'd already invested into this trip.

When I considered how much time I had left before I needed to drive back to Bergen, it became clear that my only opportunity to photograph any of the historic Viking Church designs in the middle of the country was going to need to happen in the dark.  Not just in the dark, but in the freezing cold winter dark.  This also meant standing outside for long periods of time to monitor long exposures, as well as battery and camera performance in freezing cold weather.  So be it.  These are the conditions I would need to create something beautiful in, regardless of what I had originally intended.

When I arrived at the Borgund Stave Church, the only light available to separate the dark church from the dark sky was essentially the light of the partial moon reflecting off the snow at a low angle.  There were a few spotlights designed to highlight  one portion of the back of the building, but not the side of the building that was most appealing to me and what I wanted to create.  The newly fallen snow covered any previous tracks left behind in the cemetery, creating a perfect blanket on which the headstones could form leading lines in the foreground to compliment the converging mountain sides falling to the river behind the church.  I found my position and was able to support the long-exposures with the stability of the stone fence and my camera resting on my gloves while my bare hands went back into my pockets.


This was the only shot that was worth all of this- and I'm still working on making it better in post-production.  What I started with was muddy and dark without much distinction between sky and mountain.  Each exposure needed to be at least 30seconds, even at ISO 25600 and f/8 for as much light and depth as possible.  Luckily the sky had cleared just enough that even though stars were not quite visible to my human eyes, the camera was able to pick up their subtle light with such a long exposure and sensitive sensor setting.  After 15 minutes of perfecting my settings and angles, my entire body started to feel the numbness of frostbite beginning to creep in, sending me back into my car to warm up and move on to find the other Stave Churches in the area.

The next Stave Church worth visiting seemed not too far away on the map, just across the river, but in the sleet and snow, curved mountainside roads, waiting for a ferry in the middle of the night when service was sparse, and getting lost a few times along the way, it actually took another 2.5 hours to access.  Time was running short and the delirium of being awake for so long in the darkness was starting to wear on me.

When I finally reached the Kaupanger Stave Church, the light on the front of the building was almost too bright to create a proper long exposure image with enough detail.  However, if I stopped down my aperture a bit more, I knew that light might also help provide some additional light for the scene.  Again, I set up on a stone fence, protected the camera with my gloves, and tested different long exposures until I could create one with enough clarity and detail to work with in post-production.


After the challenges of getting the car unstuck from snow, traveling up and down a mountainside full of ice, and resolving to do my best with what the night sky and darkness could allow, I decided to head back to Bergen on a different scenic route, hoping the soon to arrive sunrise would provide some beautiful river and mountain views along the way.

The extended forecast of rain and sleet did not provide the beautiful views I'd hoped for at all during the rest of my stay.  Instead, I resolved to spend the rest of my time in Norway documenting and participating in the Hygge activities that keep native Norwegians happy and healthy in the winter months.  I can assure you that driving icy roads and standing outside in the cold dark alone for a night exposure of an old Viking Church was nowhere on any of my Norwegian friend's lists of things they wanted to do.  Such nonsense is only for the madness of an inspired and determined photographer.

Denver Public Library by Michael Graves - Travel Log

posted on: October 4, 2016

In a downtown full of grey colonial and modern glass buildings, the Denver Public Library stands out like a cartoon character of whimsey and fun!  It makes sense that Michael Graves would be the architect to create something so bold and and full of crayon box features.

Denver Public Library Exterior Architecture

The fun doesn't stop at the exterior.  Check out what how the Kid's Program area ceiling was turned into a permanent circus tent...

Denver Public Library Kids Program Area 01

The real treat for me was seeing this fully wooden peg constructed mine shaft build into the top round portion of the building, which reminds Denver locals of the mining heritage that helped put this town on the map.

Denver Public Library Mine Shaft

 If you find yourself in Denver, definitely stop in and wander this fabulous public space!

Denver Public Library Exterior Architecture Detail

All photos in this post were taken on my iPhone and use is permitted with attribution from WikiMedia.

Historic Brown Palace Hotel, Denver, CO - Travel Log

posted on: September 27, 2016

While visiting other cities, one of my favorite things to do is to check out historic architecture to see what still remains of an era gone by, and the Brown Palace Hotel in Denver, CO did not disappoint...

Brown Palace Hotel Atrium Balconies

Upon walking into the atrium, I looked up and my jaw dropped in awe.  The iron work of the balconies, the under arch sconces, the carved woodwork, but most impressive was of course the delicate stained glass ceiling.  This is one of those sites that I could spend days documenting every little detail - getting lost in the subtleties and craftsmanship.

Grand Staircase Detail in Brown Palace Hotel

It could be considered the Flat Iron of Denver, based on the extreme corner angle it takes in its downtown location.

Brown Palace Hotel Exterior Flat Iron Corner Facade

I had to grab one more detailed image of that amazing stained glass ceiling... the detail is just phenomenal...

Brown Palace Hotel Atrium Stained Glass Ceiling

All photos in this post were taken on my iPhone and use is permitted with attribution from  WikiMedia.


AIANY New York New Design Show

posted on: February 14, 2016

01_NewYorkNewDesign16-2225

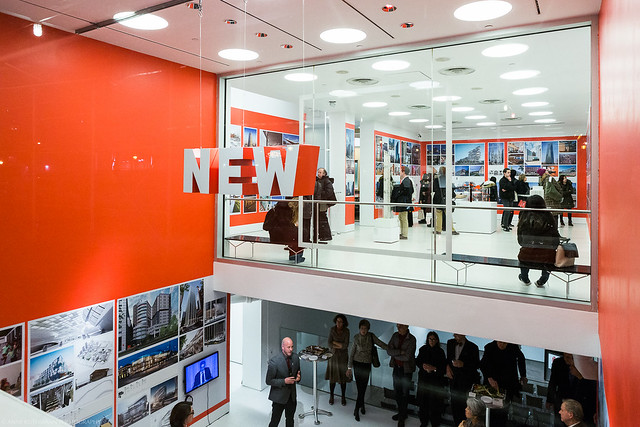
On February 11, 2016 the AIANY New York New Design show opened at the Center for Architecture and it will run until May 28, 2016.  While I love these exhibits as a chance to geek out about architecture, this one is most exciting for me personally because this is the first time my architecture work is being exhibited publicly.  It's even more awesome that it's not just a random gallery, but a gallery curated by architects and dedicated to the architects of New York.  I'm especially grateful that the images chosen represent the New York Aquarium Shark Tank project I worked on with JVC Architects & Stephen M Taylor AIA, LEED, AP.

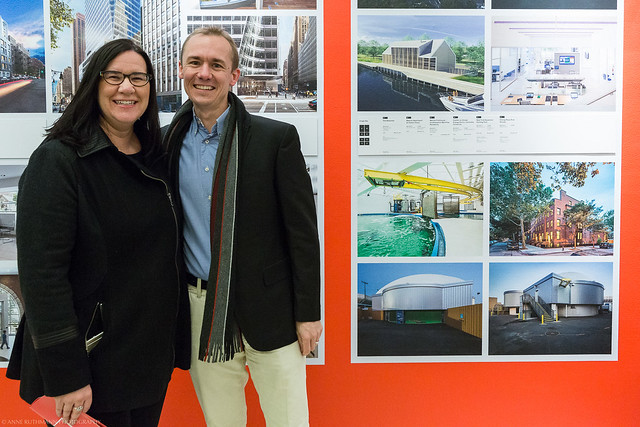
My dear friend Brian Wright stopped by and grabbed a photo of Stephen and I standing next to my images of the Shark Tank's interior "shark rollercoaster" yellow overhead crane, front exterior with viewing glass and shark, and rear exterior elevation to allow easy transport of sensitive marine life into the tanks.  The Center for Architecture did a great job of curating and designing the exhibit in such a way that I will probably go back a few more times to look at all of the other works as well.

11_NewYorkNewDesign16-2257

In one of these images, it is so tempting to want to retouch an unfinished paint job on the fencing.  However, when the architects and I were discussing what should and shouldn't be photoshopped in the images, it was decided that that little odd detail helped prove that this was a real photograph and not just a rendering.

You can see a few more images from this project over on my --> Facebook Page.

World Trade Inspired | Behind The Image

posted on: November 24, 2015

It's hard to think of interiors and architecture as having "moments", but this was one of those moments when several things aligned and made me geek out about an otherwise very plain image of office furniture.  

World Trade Inspired Office Furnishing Interior Photography


I knew I wanted a detail of the carpet, stools, filing cabinets, and desk, to highlight some of the designer's choices, but there were several of these to choose from throughout the office, so I kept looking until something inspired me. Then I noticed a set with the One World Trade building right outside the window- and that's when the "moment" of inspiration struck. Not only were the stools shaped like One World Trade as the edges angled upward toward a flat rounded top, but the carpet's hexagon design was a close relative of the octagon formed in the middle of the One World Trade building as its isosceles triangle facades aligned at even widths. Finally, my creative vision for making stools, carpet, and filing cabinets look more interesting.

The only problem was you couldn't tell exactly what building was out the window from the standing height normally appropriate for this desk. In a straight-on-view mid-height, the mirrored facade of OWT reflected the mid-height clouds in the sky and distorted some of the building shape.  So I squatted lower, and lower, and then even lower, until basically laying on the ground for a window perspective looking upward that allowed the crowning shape of OWT to be compared to the detail of the stools and carpet.  To give you a broader image of this scene, there were people working in this open layout office while I was there, just going about their regular office routines until spotting me essentially laying on the ground in the middle of their office to take a photo of some stools. It's probably good that I'm not embarrassed easily. When a "moment" of inspiration strikes, I'll do whatever it takes to make it work.

However, the work never stops at the capture of the image. This image wasn't actually possible in the camera itself, so if you'd like to know a little more about the technical process of creating it, read on...

First it required two different RAW exposures on site in order to get a proper exposure of the interior and a proper exposure of the exterior. From the settings below you can see these exposures are 3 stops apart (the only difference was changing the shutter speed from 1/10th of a second to 1/80th of a second). While RAW files can be pushed and pulled about 1 stop of light in over or under exposure without too many artifacts or distortions, anything beyond a full stop difference really needs to be a separate exposure.


Next was color correcting the interior image color to more accurately reflect the material and design colors without too much of the florescent orange light color cast and without too much natural blue light color cast. This is one of the most subjective parts of editing because it relies on the color sensitivity of our eyes both on site when photographing as well as our color memory when we're behind the computer.  The window exposure was already perfectly daylight balanced. If I tried to color correct after combining images, the window view would become an unnatural neon blue.

While many people think a grey card can solve the problem, it isn't very reliable under mixed lighting conditions and is highly likely that you'll still end up tweaking it in post-production to find something that balances better over the entire scene. Grey cards are great when you have consistent color across scenes as you do with studio lighting, but interiors are a messy blend of natural and artificial light, sometimes up to five different color tones of light across one space. If you're color blind, yes, use a grey card to get colors somewhere close to where they need to be. If you have great color sensitivity, you'll likely be doing the same amount of adjustments with or without a grey card.

Once my interior colors were as close as I could get to what I saw when I was on location when adjusting for various color reflections, the next step was to bring the window exposure detail into the interior exposure image using layers and masks in Photoshop. Sometimes it's possible to combine exposures with HDR software, but I've found that you end up losing a lot of latitude in highlights and colors when a software tries to average different images together.  
To demonstrate this, below is an example of the best possible detail after using HDR software on the left, versus masking in the window exposure manually on the right. The HDR software failed to pull in any of the blue sky outside, and yet decided to fill in a highlight on the filing cabinet with a blue color cast. You can also see how the HDR version reduces the amount of detail in the ceiling. Occasionally, when exposures are close enough, HDR software can be effective, but when the difference is this dramatic and selective, masking provides more control. I was also very careful not to allow the window scene to be bolder than the interior, because that would also be unnatural to the eye, and take the focus off of the interior design choices.

I believe that when an image is crafted well, you don't actually see all of the work that went into it. If it looks as natural on screen as it would to our eye in person, than I feel like I've done my job well to convey the design as clearly as the air that surrounds it.

Gates Hall | Morphosis Architects

posted on: September 11, 2015

Gates Hall, Cornell University, Ithaca, NY

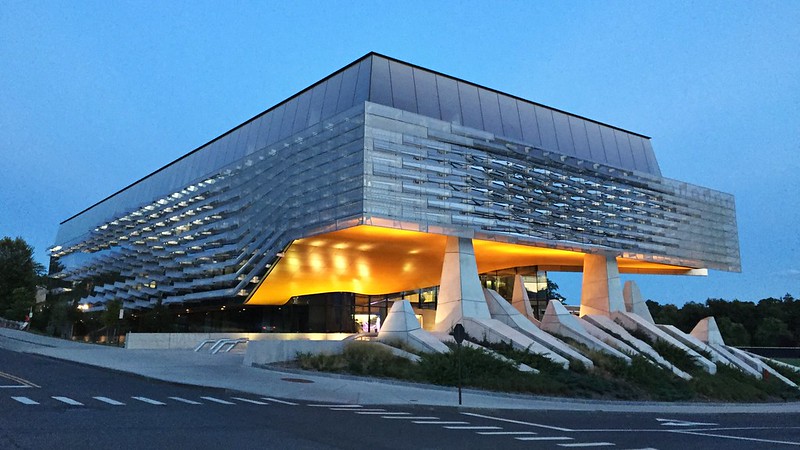
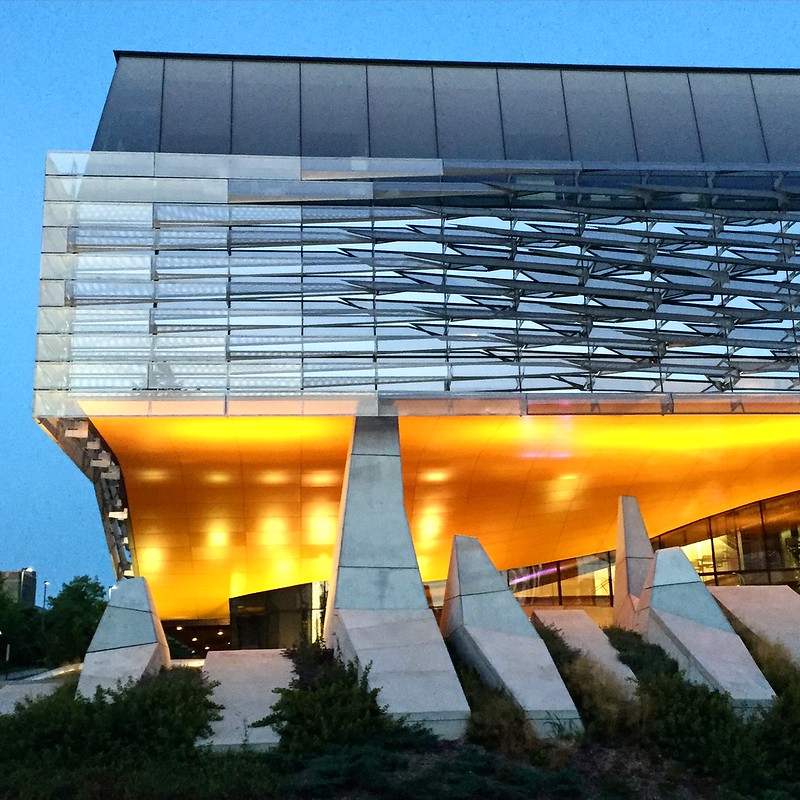
While exploring the Cornell University Campus during a recent vacation, I had one of those drive-by, step-on-the-break moments when the lighting on a building was so perfect that I had to stop the car to get out and document it.  Never mind that the only thing I could take a photo with at the moment was my phone- when color and light align so perfectly on a structure, it's a rare treat and all that matters is freezing that moment in time because it may never happen again.

I just love how perfectly the light filtered through the glass scales and reflected back again to highlight the simultaneous translucency and reflectivity of glass.  The brilliant gold ceiling creates the perfect color contrast to the deep blues that were present in a rare clear Ithaca twilight.  I'm trying not to beat myself up about wishing I'd had my other cameras with me... and just enjoying that I caught the light when I could with what I had.

Gates Hall, Cornell University, Ithaca, NY

To learn more about this building, check out:

Cornell Engineering: Gates Hall : A New Home for CIS

Cornell Blog: Explore Gates Hall

Archpaper: In Detail > Cornell University's Gates Hall

Archpaper: Crit > Bill & Melinda Gates Hall

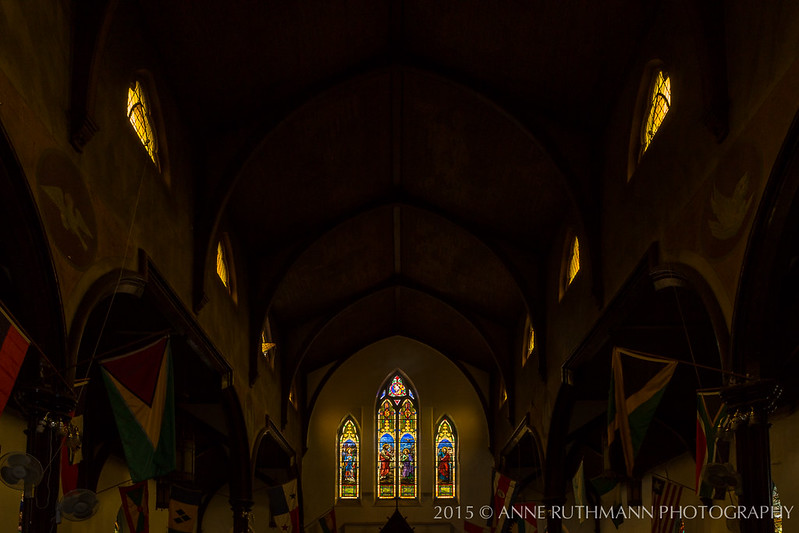
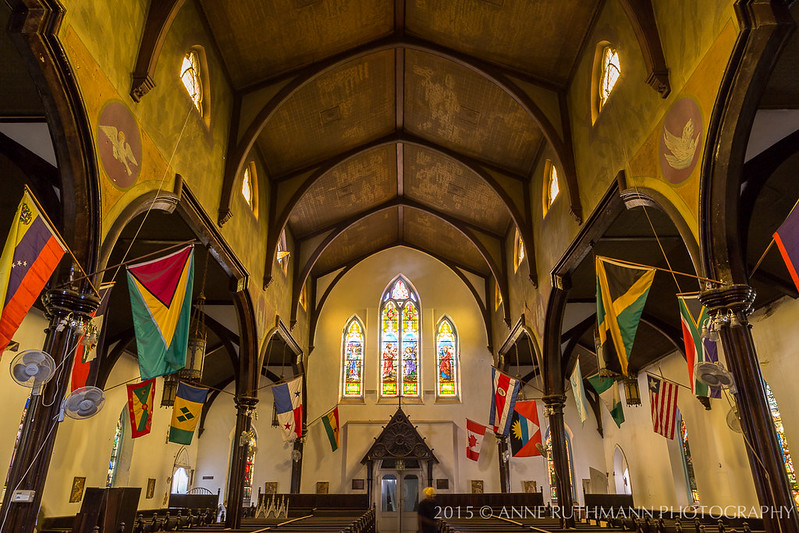
Church of the Redeemer - A Decommissioned Sanctuary

posted on: July 29, 2015

When I received an inquiry about tracking down and photographing a few works of stained glass art that remained in a Brooklyn church, my heart skipped a beat.  A project I'd always been passionate about - preserving architectural artistry and history- coming to my inbox through a client commission.  Little did I know what work was ahead, or even if the stained glass art still existed.
27_Church-of-the-Redeemer-7139

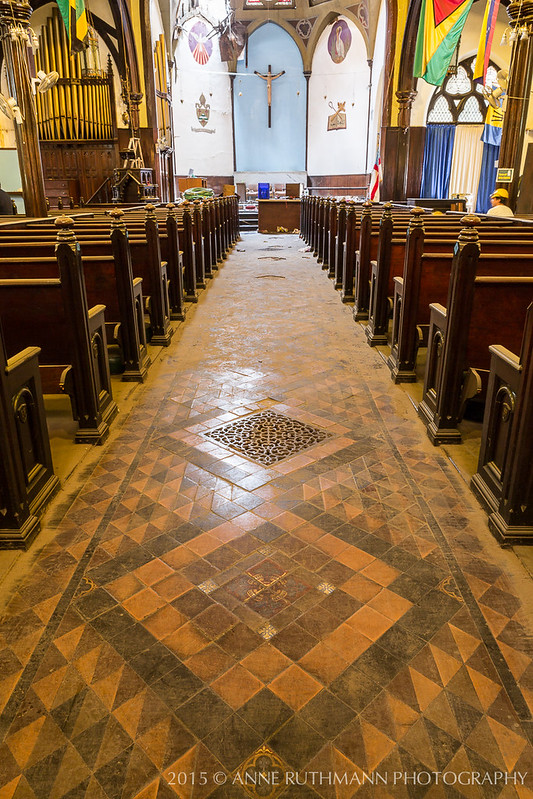
I've always loved churches with big sanctuaries.  The atrium-like spaciousness of the high ceiling, the echo of the chamber that allows songs and chords to last a little longer, and the peaceful quality that people bring as they enter in humility, grace, gratitude, and gathering.  The sanctuary often built in stone as a symbol of safety and stability, but with delicate stained glass to bring in ethereal light.
26_Church-of-the-Redeemer-7122

In recent years, it seems like there's an increased frequency of these vast sanctuaries going into disrepair, many without enough congregational tithes to keep them maintained or even occupied. So many beautifully crafted buildings, adorned with donated artifacts and artistry, but difficult to maintain on volunteer efforts.  What will become of them all?
29_Church-of-the-Redeemer-7148

In the case of Church of the Redeemer, it will be torn down to become a mixed use building set on prime retail and residential real estate with the subway below, the neighborhood behind, and more shopping across the street.  But what will happen to the artifacts?  The Midmer/Gunzelman pipe organ, the stained glass windows, the wooden doors and pews?
45_Church-of-the-Redeemer-7215

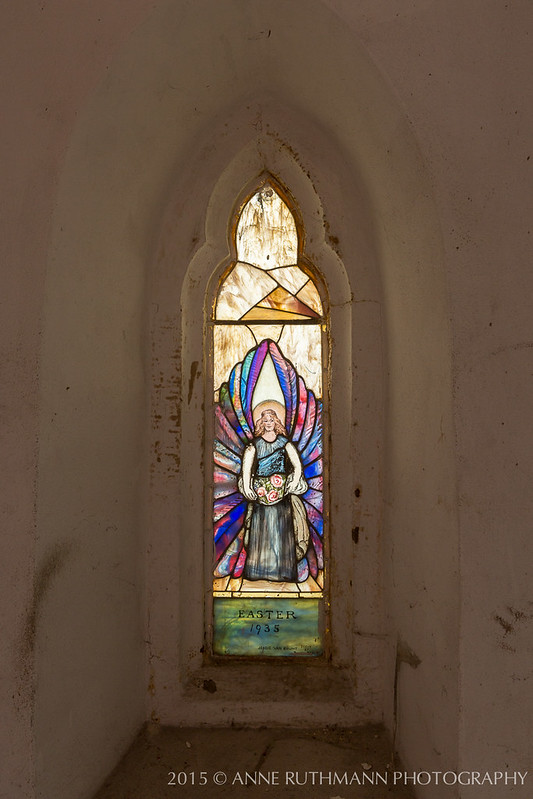
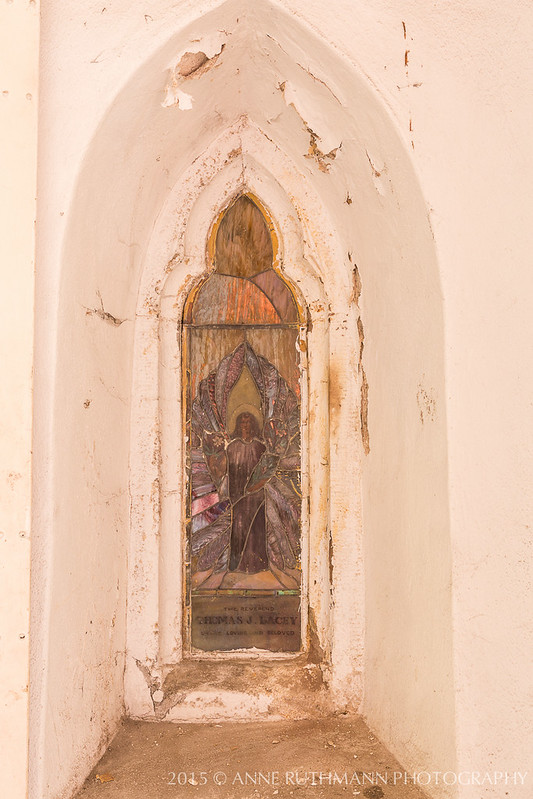
For one stained glass artist, Jessie Van Brunt, who signed her own work before donating to the church, there is still hope that her works will be recovered and preserved.  Though Jessie died in 1947, one of her surviving relatives, Karen, has been on a mission to recover as many of her art works as possible and got in touch with me to help.  This hunt has led Karen to inquire about churches in places like Alaska and London, only to find that the churches have already been destroyed by fire or war, leaving little hope that Jessie's work would remain in a decommissioned church.
23_Church-of-the-Redeemer-7096

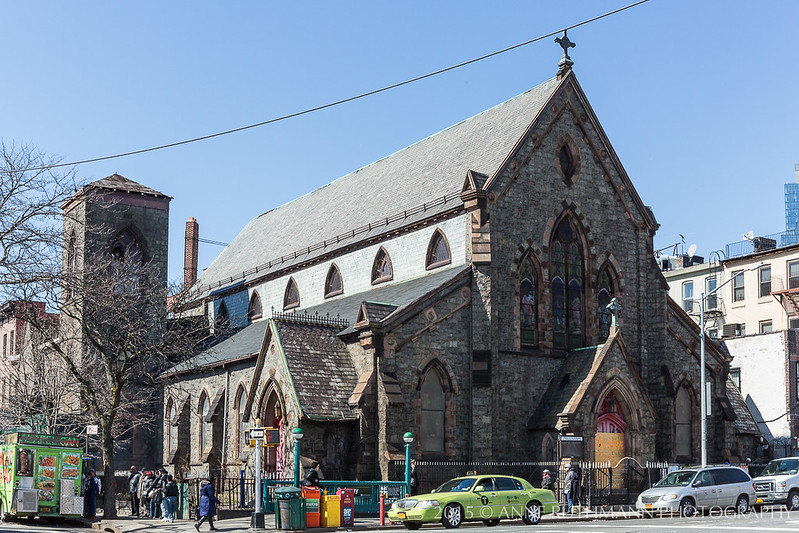
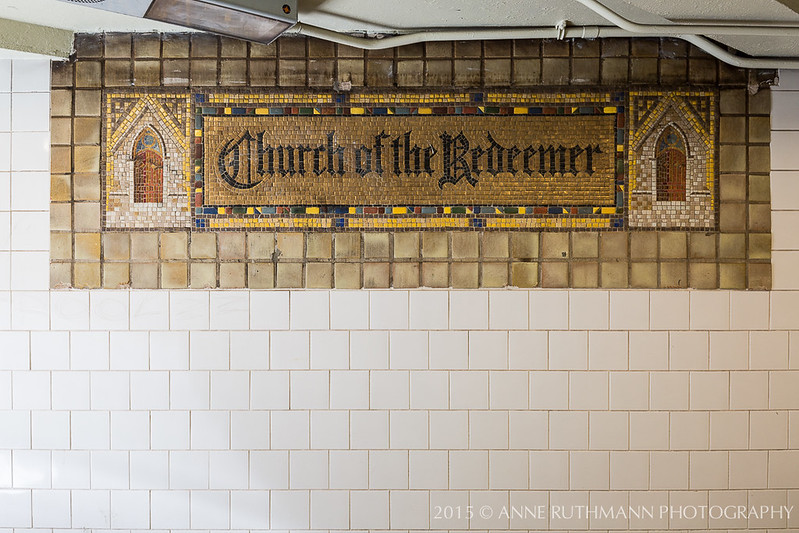
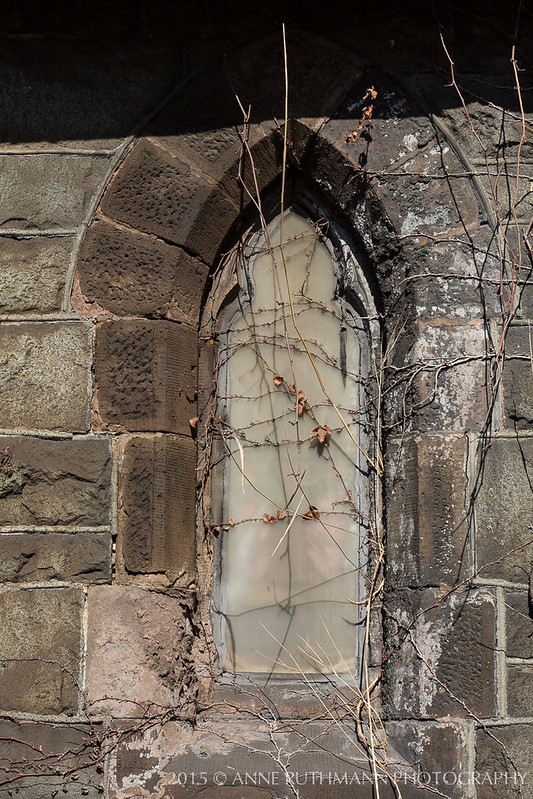
Even though the historic building was sold in 2012, I found it still standing on the corner of Pacific Ave & 4th Ave, giving direct reference to the subway tiles immediately below when I first arrived in April 2015.  Hardly any scaffolding had been put up yet and it seemed as though many of the original windows were still in tact.  It amazed me that this church hadn't been landmarked with such an iconic presence and location, but for whatever reason, this 1866 bluestone building never made it through the process.
59_Church-of-the-Redeemer-1155

48_Church-of-the-Redeemer-1135

I compared historic Smithsonian Archive photographs to see if I could first identify if the windows were still there.  While the windows were mostly covered from the outside, a few of the window shapes appeared to be similar enough, so I grabbed whatever reference photos I could get on my first visit in order to zoom in later and get a closer view for comparison.
57_Church-of-the-Redeemer-1149

Many of the windows on the building had similar shapes and similar visual themes, so it was only through getting as much detail as possible from all of the photographic records I could obtain on site and comparing them to the Smithsonian archives that allowed me to determine that yes, Jessie Van Brunt's stained glass windows were still in the church and still in an acceptable condition to photograph and to potentially remove for preservation.  However, gaining access to the interior proved to be an entirely different challenge that would take months to unfold, as the developer wasn't interested in providing access to the building.
71_Church-of-the-Redeemer-165580_Church-of-the-Redeemer-1681

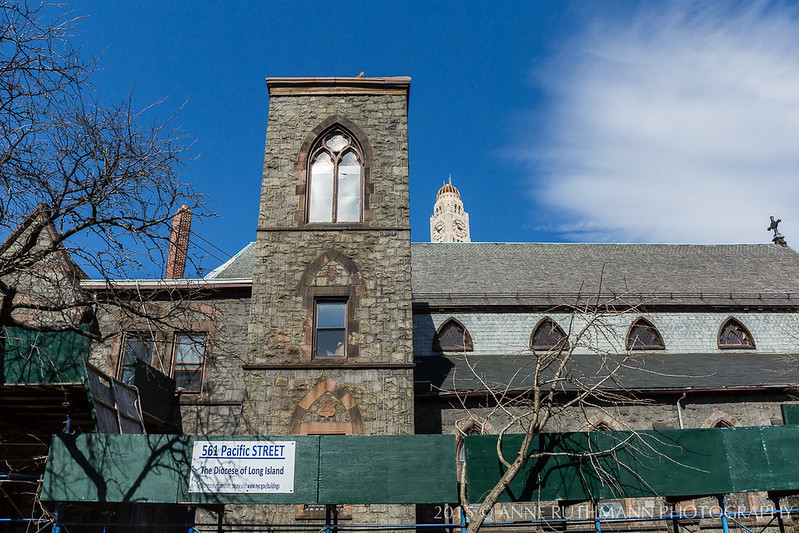
A tip from the Brooklyn Historical Society helped me learn that The Demolition Depot was able to make arrangements with the developer to remove many of the artifacts that the community was concerned would be destroyed in the processing of tearing the building down.  Several of the items that I had been sent to photograph had already been removed from the building, but the windows that I could identify from the exterior of the building remained.  The challenge was then to create as much of a detailed archival record of the stained glass window as possible, so that if it suffered any damage during removal, it could be pieced together exactly as it has been created.  Unfortunately, one window was now completely obscured by construction scaffolding on the front of the building, which did not exist when I first requested access back in April.  Instead of focusing on obtaining the best color from the light no longer available through the covered window, I turned my focused to the texture and construction of the stained glass.  I also chose to provide enough context around the window in order to demonstrate its architectural placement and the space that had been carved for it in the building, which would be lost once the building was gone.
18_Church-of-the-Redeemer-705219_Church-of-the-Redeemer-7058

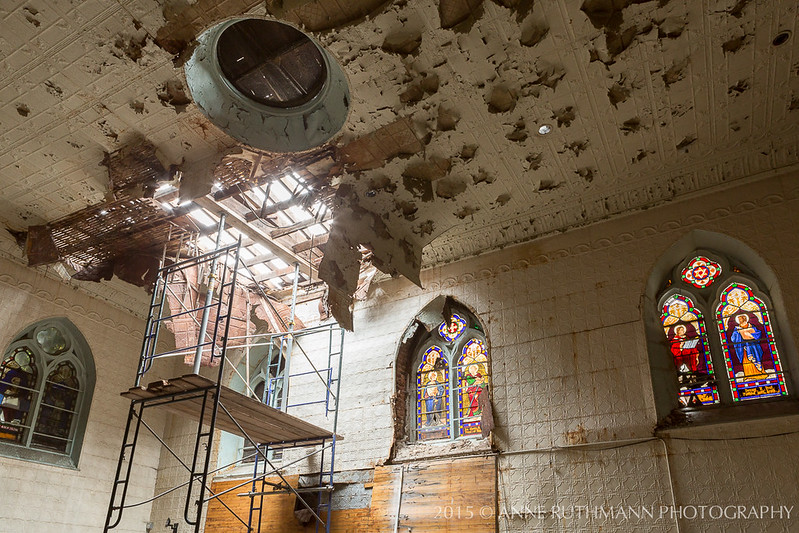
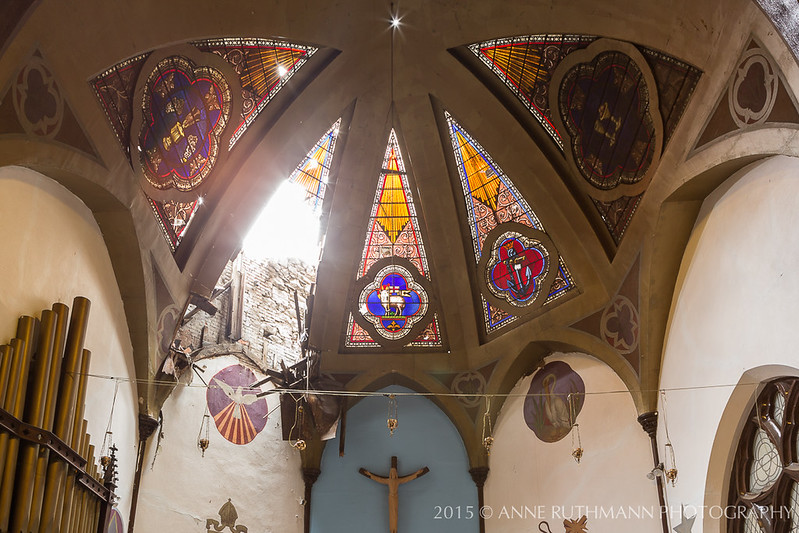
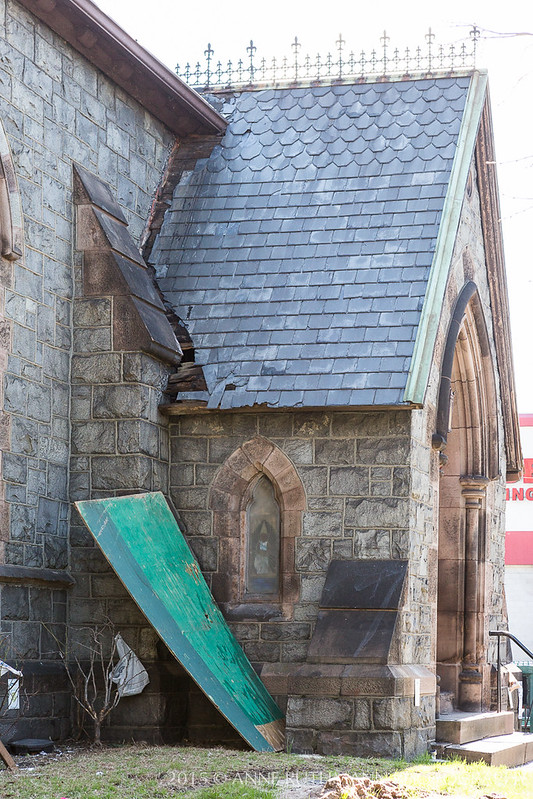
This church sat empty for 3 years before an architectural salvager was allowed access to remove the artifacts for preservation.  If access had been granted sooner, less damage would have been done and more materials could have been recycled or preserved before they were rusted, warped, or broken.  Some other decommissioned churches I've seen have been in much worse condition than this after just one year.  The damage is almost always a result of a leaking roof or broken windows that could easily be repaired with small fixes accomplished during regular observation.  The neglect and failure to act on minor problems until they become large problems are what create the most damage.
37_Church-of-the-Redeemer-7193

One of my hopes is that by sharing this story and these images, any future churches seeking to be decommissioned or sold will give time for family members, their congregation, and any historic groups an opportunity to find ways of preserving what is meaningful.  Quite a bit of the labor and artistry put into churches was done on a volunteer basis, or as a gift of gratitude.  It seems the least we can do is to give the craftsmanship of these artisans some consideration and opportunity to be saved, even if the structure itself cannot remain.
12_Church-of-the-Redeemer-7031

I'm grateful that I was given the chance to preserve what is left in imagery.  Even if further damage is done or if the artifacts end up in a private collection, what has been preserved in images now can be remembered and shared in clarity and colorful detail.  To see more images from my documentation of the Church of the Redeemer, visit:
Church of the Redeemer - Brooklyn, NY - 2015


Parrot Bebop Drone Image Quality Review

posted on: March 23, 2015

As an architectural photographer, I occasionally get requests for aerial views of properties.  The only problem is that most of these requests are coming from individual property owners or small businesses who can't afford the highest quality imagery that comes from a helicopter or cherry picker option.  In some cases, even if they could afford it, certain tightly constructed urban areas make it very difficult to get a specific elevation with either of these methods.  Enter: drone photography.  Depending on the model, drone photography becomes a more affordable, albeit slightly lower quality option for aerial photography when in the hands of a skilled drone operator.  For the purposes of this post, my tests fall under recreational usage on family private property.

In order to see if drone photography would be a solid option in my service offerings, I decided to pick up the Parrot Bebop Drone while browsing the Apple Store.  The salesperson was actually pretty knowledgable in drone options, which helped me decide to give it a try at what I would consider to be a very inexpensive investment of $499 for this particular model, which is also a great price point if you're a tech geek and want to play with something until breaks, but not feel too bad about it.

Build:
The quadricopter craft is surprisingly lightweight, mostly made of light plastics and styrofoam, with the heaviest components being the battery and camera elements.  At first it feels a little flimsy, but after you've used it a few times, you realize how robust and durable it actually is.  The construction alone feels like an inexpensive build, but when you consider the materials science that must have gone into finding the right plastic, testing of different materials for durability, and various trials needed to achieve this design, it's worth so much more than that.


Battery:
Huge praise to Parrot for including 2 batteries in the box.  Each one has about 11 minutes of flight + image capture time.  They knew the limited scope of the battery life and didn't force you to buy a second battery after you've exhausted your first 11 minutes of learning how to fly.  They also created a battery charger that can do a fast charge of around 1 hour until full, with international adapters already included.  The lithium-ion batteries are very durable and powerful and should last at least 1-2 years with this fast-charge cycle.  The element for plugging in the battery to the craft is a little tricky and took about 10 minutes to line up properly, but once I gained more confidence with just pulling the plug out from the nose with a little embedded nylon string, it became much easier to switch out batteries.

Controls:
I started with just using the iPhone App for controls.  It provides a live view of what the camera sees during flight, with the option to move the image capture around quite a bit within the fisheye lens view.  The live view and controls are all done over a Wi-Fi network established by the Drone itself.  This also means that the range of controls is limited by the Wi-Fi range and any interference that your smart phone or iPad would pick up on.  Obviously, a wide open farm field or park is going to give you much more control than an urban area where any number of interferences can occur.  This interface is actually really robust and advance (not that I have much to compare to at this point), but I was impressed with the quality of controls.  I would probably prefer to use an iPad so that the accelerometer wouldn't be so sensitive, but thankfully, the app has built in controls that allow you to mitigate the speed of the lift, turns, and directional movements, which helps make it easier to control with something small like an iPhone.  The YouTube Parrot Bebop instructional videos were very informative on how the controls work for more info on what all these buttons mean.


Stabilization:
This is probably the most impressive feature of this craft.  It has AMAZING stability for its lightness and controls.  I shook that thing a lot and the video imagery refused to budge on the horizontal plane.  Where it suffers a little is the left to right stability which can more easily be affected by wind or changes with operator controls.  The stabilization differences are less noticeable when the craft is flying forward,  backward, or panning to the side, but much more noticeable when hovering the craft in one spot.  View one of my test videos posted on Instagram to see an example of this:


Image Quality:
My biggest concern as a photographer is image quality.  As a professional photographer, I have a VERY high image quality standard that is based on over a decade of looking at images in great detail and depth.  That being said, I allow for concessions regarding imagery depending on use- for example, I'm extremely satisfied with the quality of imagery from my iPhone cameras since the 4s model, considering how small, lightweight, and easy they are to use.  Unfortunately, what the Parrot Bepop gains in all other areas of drone technology, it still has a way to go in image quality considering the entire design is for image capture.

The lens is actually not that bad for a small fisheye lens, it's more that the sensor quality and depth is much more limited than mobile phone cameras- the quality is similar to what you'd see in a ten year old point and shoot camera.  To the untrained eye, this isn't that much of a problem, but to an imaging professional, I can see the image limitations.  The biggest limitation is the exposure depth.  The color quality is actually really decent, but the highlight to lowlight range shows a strong preference for detail in shadow, which is fine as most people don't care about detail in whites, but it is limiting if you're photographing a white home or white roof, which I did during my tests.  If I had reduced exposure to favor highlights, I would have lost most of my shadow detail, so it's most likely a restriction of the compression to JPEG or DNG from the original capture.

Here are a couple more examples I shared on Instagram of the image quality in both a still image and in video mode:

In this video I'm testing the Parrot Bebop metering response, auto white balance response, autofocus, indoor exposure, and video image detail. The drone isn't in flight-mode for this test- all of the movements are from me holding it in my hand- but again, you can see that it holds the up down movements very steady despite my manipulation of the craft. The first few seconds demonstrate how long it takes to transition exposure from outdoor sunlight to indoor lighting, and how much of the scene needs to be of similar exposure for the metering to catch on and make adjustments. At 50% of the scene, the camera held to the first exposure, and it only transitioned exposure when about 70% of the scene had changed exposure levels. The first few seconds also demonstrate that you have great detail and clarity in a sunlight exposure whether the subject is 3ft or 300ft away as observed by the detail in the lace curtain as well as the detail on the building outside. In the second half of this video, I'm looking for white balance adjustments between sunlight and tungsten light, as well as indoor lighting detail. You can see a very slight white balance adjustment as @alexruthmann's white shirt enters the frame. It seems to compensate a little too blue for my tastes, but the scene with wallpaper and wood is a heavy yellow tone rather than a neutral white tone, so it's doing fine for this test. I did prefer to set the white balance in advance when I had a specific still image in mind. In the white shirt you can see the white clipping happening- which is much more difficult to control in video than a still shot. Most people don't care that much about white detail if it needs to be sacrificed for a better overall scene detail, but it would probably appear slightly less obvious if there were a few more chromatic-abhorration corrections built into the image compression. At the very end of the video, you see me bring the camera very close to the stack of books to see how detailed the short focal range is indoors. There's definitely some focal detail sacrificed in lower-lighting conditions, however, the fisheye lens has great detail even inches away.
A video posted by Anne Ruthmann (@anneruthmann) on


An example of the highest resolution still image possible with the Parrot BeBop. Without distortion correction applied, the image is around 3000px, after the image is corrected for perspective, max image size is around 1800px. Because this camera is almost entirely automatic exposure, the best image quality is in daylight. The metering appears to be full frame metering, so it's easy to blow highlights and lose shadows depending on the image. There's minor exposure compensation controls, but because the output is either DNG or JPG, they are compressed and processed files straight out of this camera. I had to customize a lot of the default settings in order to take this image successfully, but I found them quick and easy to find and manipulate after watching the YouTube help video tutorials. It took at least 20minutes of practice navigation time to figure out how to get it at the height I wanted and positioned with the camera angle I wanted, while avoiding things like trees and power lines. Still not sure if I'm sold on this particular model, though I do think it's a really solid investment at its price point for everything it can offer. With enough experience, you'd be able to customize it's controls to suit your needs and help you get the imagery you need within the limited battery life and wifi control range. The images still wouldn't be much use beyond web-usage and I still need to view them much larger on my laptop for a true quality comparison. I do give high praise for the app development team who created a very robust control, capture, and documentation system with this particular drone. It would be great for anyone who needs to cover specific plots of land with documentation mapped out of that coverage. #anneruthmannphotography #testpilot #aerialphotography
A photo posted by Anne Ruthmann (@anneruthmann) on


*This review is completely independent and I have not received any compensation or product to provide this review... though, if you feel like sending me more drones to try in exchange for a review, I'm all for it since I'm still looking for the right model to use professionally.

Deutsches Haus | 8th St. & University Place, Greenwich Village, NYC

posted on: February 12, 2015

Deutsches_Haus_2014-4391

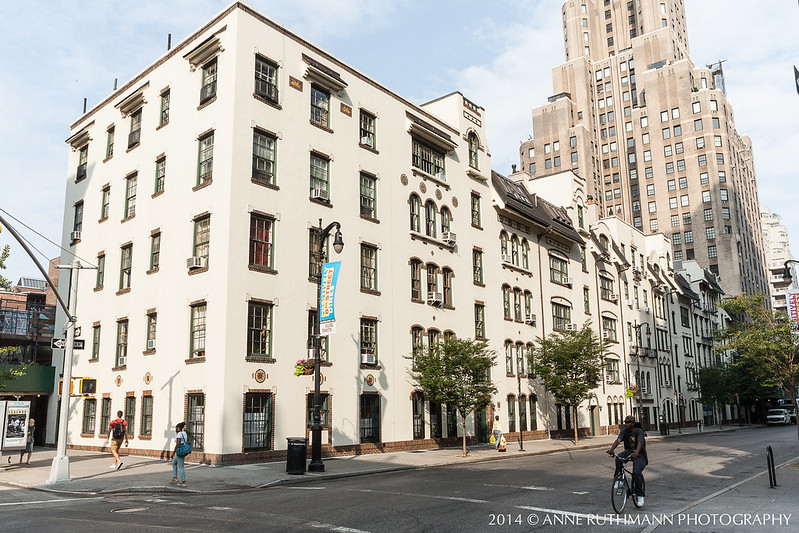
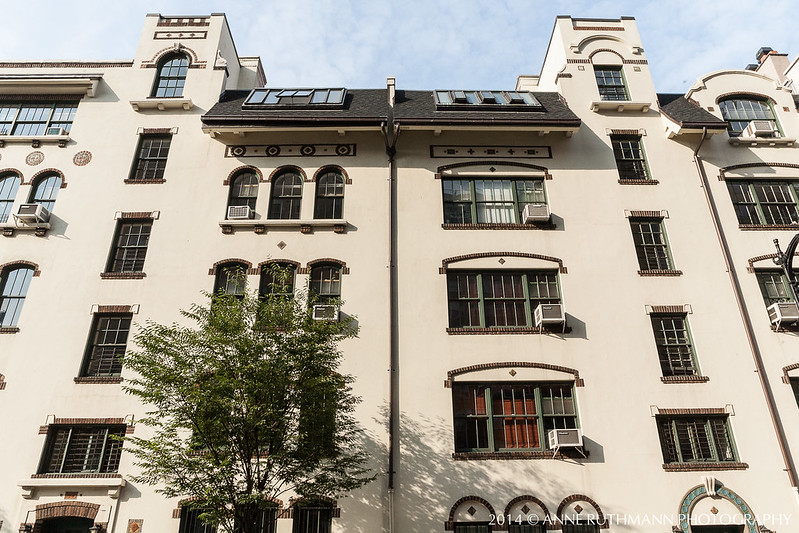
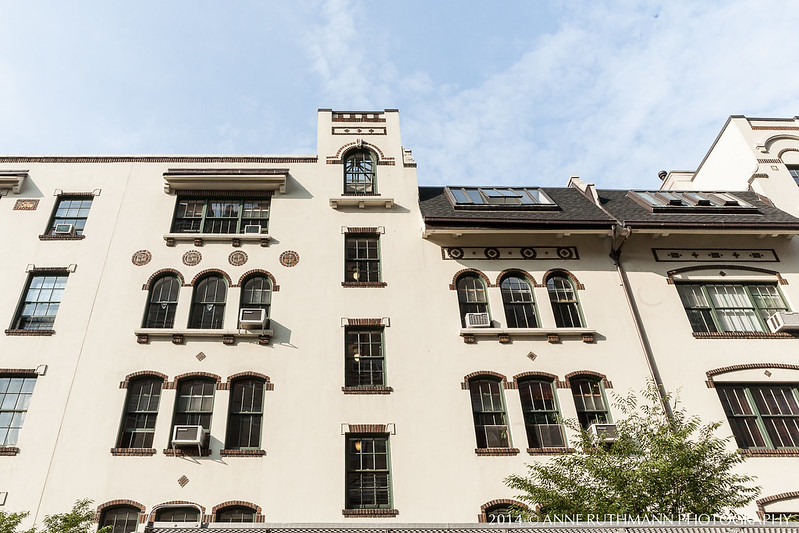
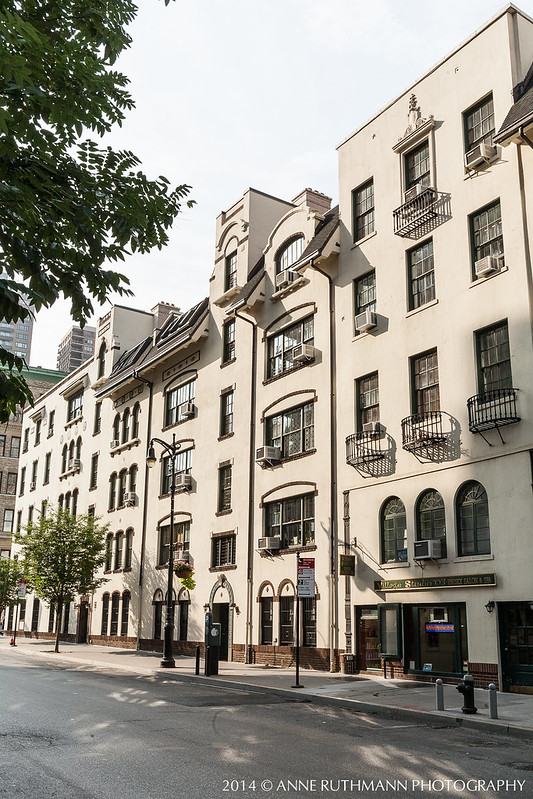
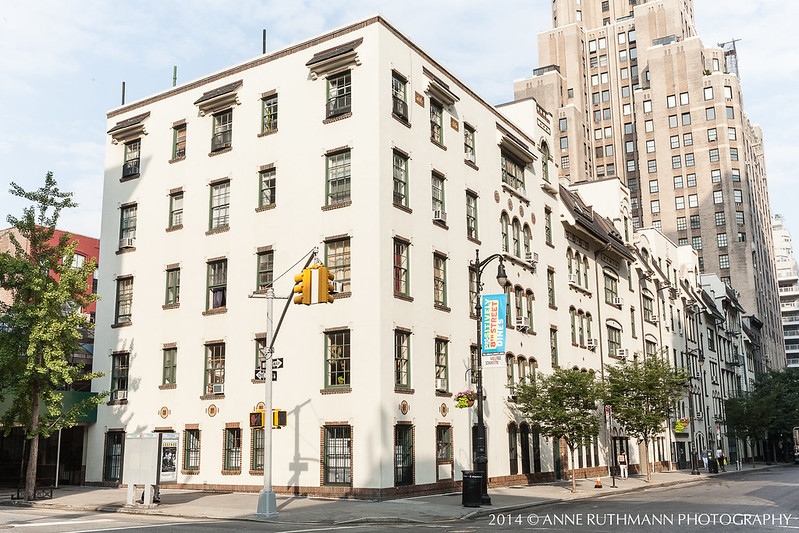
It's not often I feel compelled to do a photo study on a building I haven't been hired to photograph, but after walking by the Deutsches Haus several times, it compelled me to return with my camera in hand, specifically for the direct morning light on its East facades.  NYU has recently invested in deep cleaning many of the building exteriors around Washington Square and this building is one which can easily attract the black grit of the city into its many different textures, so I felt especially lucky to capture it in such pristine condition.

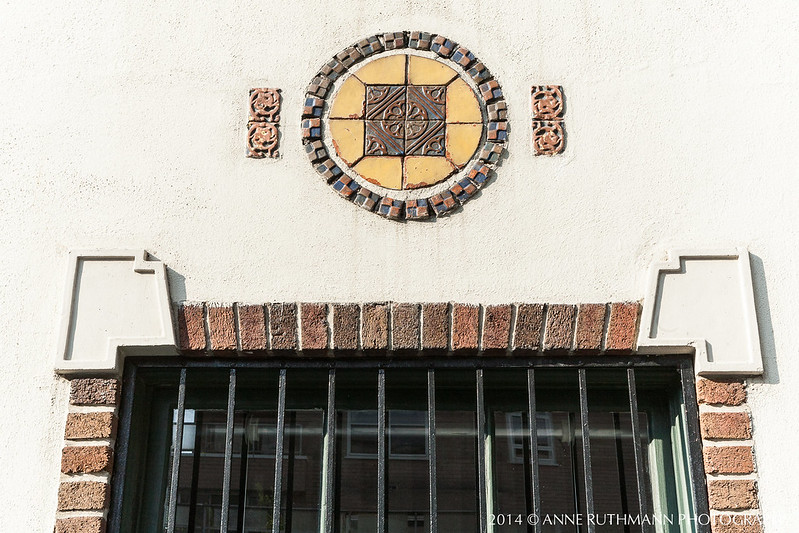
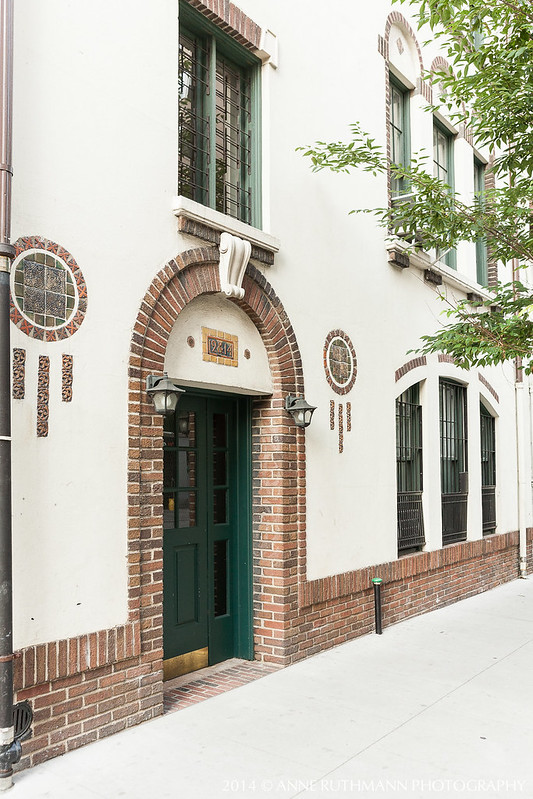
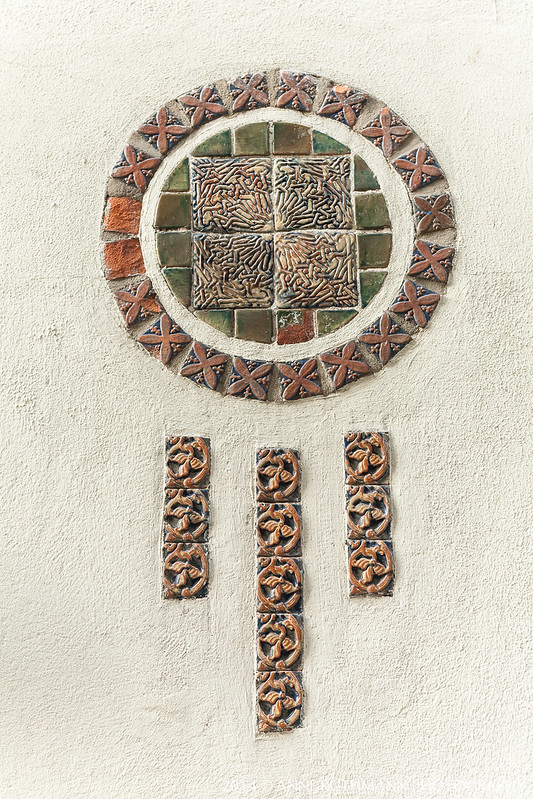
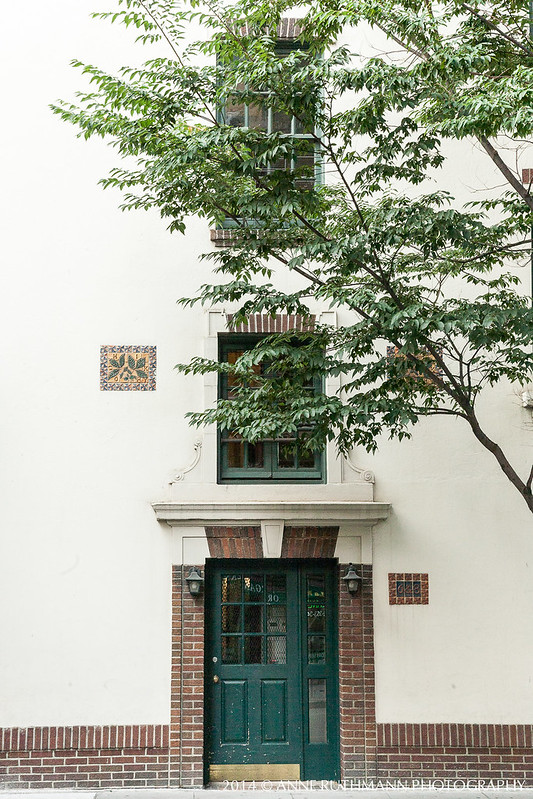
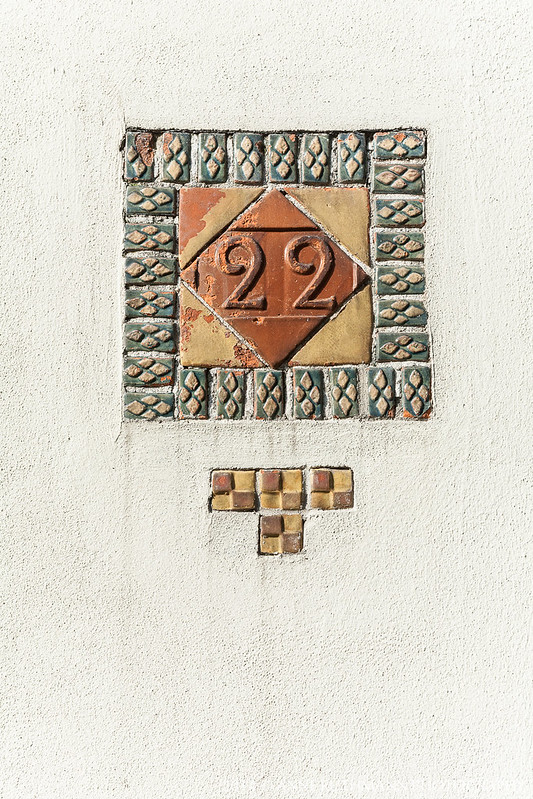
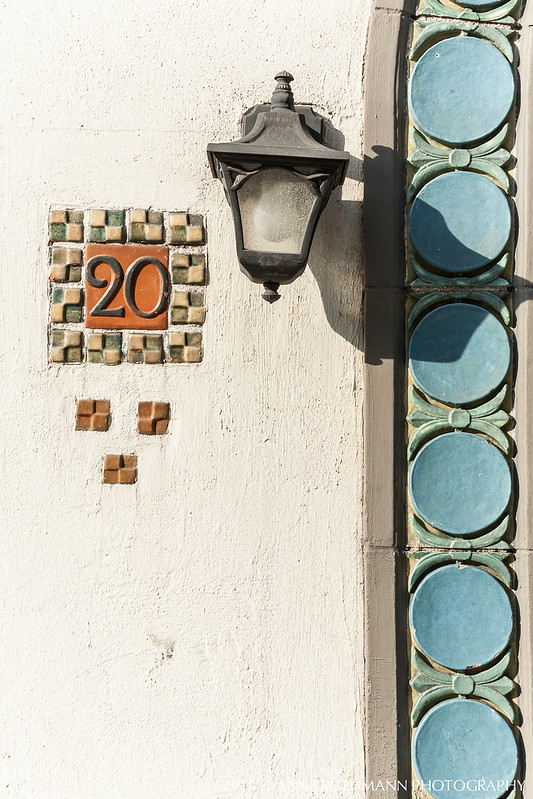
It's such a unique design among the other buildings in the neighborhood, which also means that it gets plenty of attention on its own, but I wanted to document some of the specific details that make it a truly hand-crafted work of love.  In order to highlight the dimension and detail on the arts & crafts style tile work, I knew I needed direct lighting at such an angle that the depth of details could be highlighted without too many shadows or reflective obstructions.  It took about 40 minutes after my arrival for the sun to move into a position that allowed the tile color and dimension to really stand out beautifully against the stucco walls.

Deutsches_Haus_2014-4379

Deutsches_Haus_2014-4376

Deutsches_Haus_2014-4360

Deutsches_Haus_2014-4363

Deutsches_Haus_2014-4364

I especially loved this dream-catcher style motif surrounding this door as it makes me wonder if the resident or former tenant had a special connection to Native American culture.
Deutsches_Haus_2014-4374

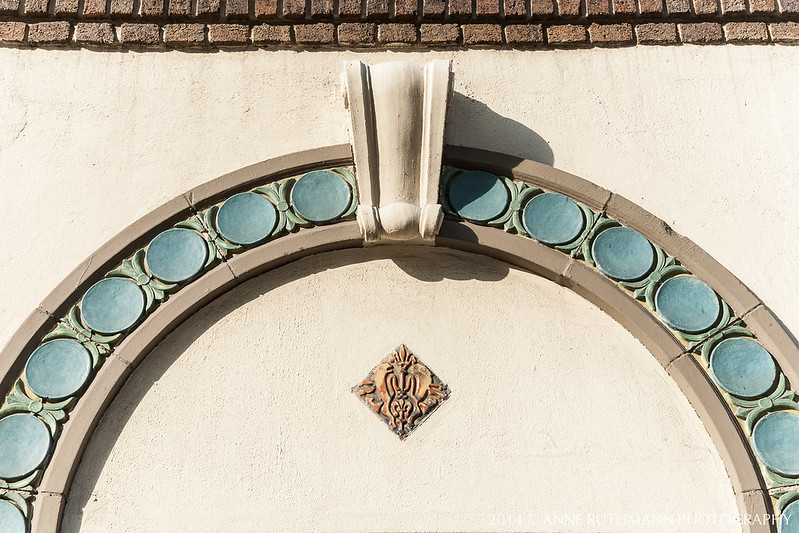
As you can see in tile detail, due to the deep relief and age of the glazes, some of the tiles are coming apart and would be very difficult to replicate with the same glazes originally used.  I'm just happy that I'm able to document it as it is right now, before further damage can occur.
Deutsches_Haus_2014-4372

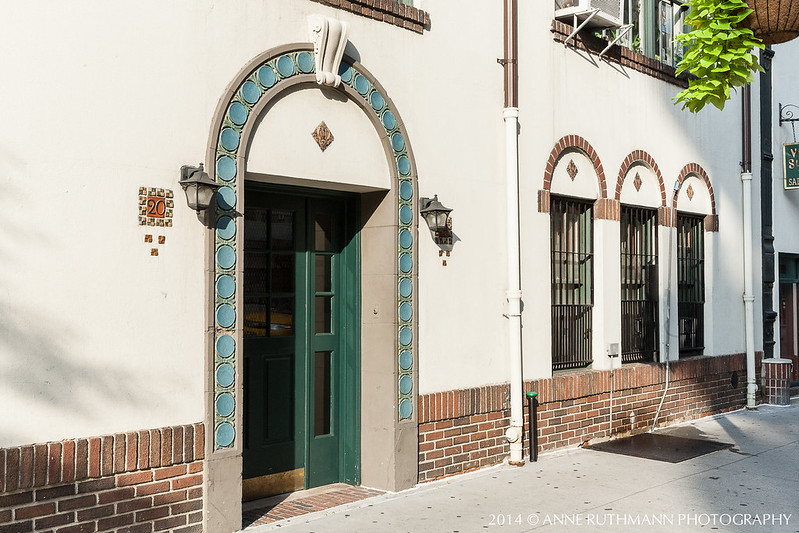
I love that each entrance maintains a separate design that still flows with the entire building design.
Deutsches_Haus_2014-4358

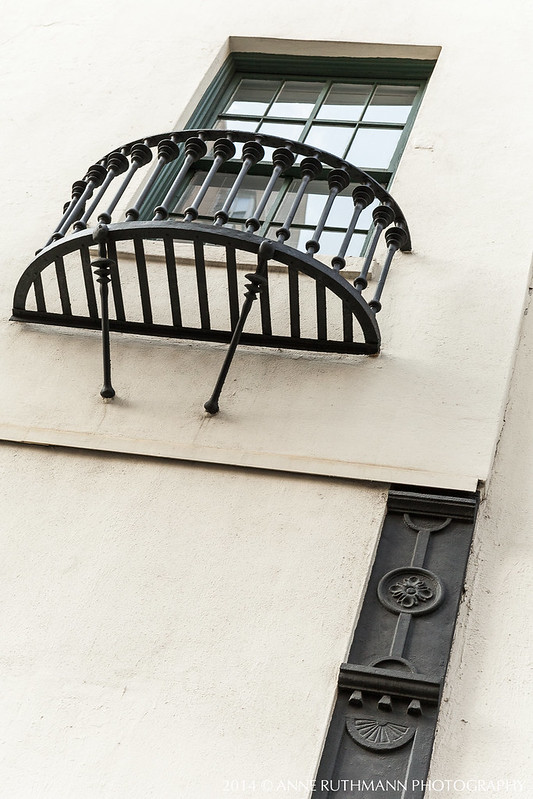
I found it especially interesting how the ironwork contrasted to the other elements of the building.
Deutsches_Haus_2014-4368

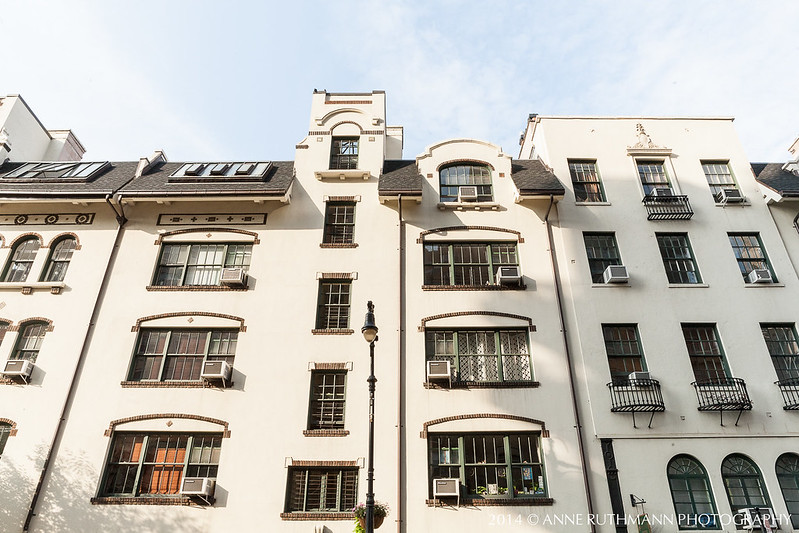
The architect and designer created just enough unique elements between different sections of the building so as to delineate each vertical section of windows as a unique set from the adjacent columns of windows, emphasizing a row-house arrangement on the interior while retaining a sense of grand cohesion on the exterior.  I especially like how the rooftops are different shapes and create an outline for each column of windows intending to represent which windows belong to the same or different units.
Deutsches_Haus_2014-4359

Even here, where there is structural symmetry, the exterior design clearly defines that these are to be regarded as uniquely separate spaces.
Deutsches_Haus_2014-4396

This particular skylight section almost suggests that there should be a bell tower here, as if it were a Spanish mission.
Deutsches_Haus_2014-4393

At the far end, it feels almost Italian with the crest relief and faux balconies under windows.
Deutsches_Haus_2014-4400

If you're interested in learning more about this building's past and its current occupants, I found a great lecture on the history as well as a link to public events sponsored by the NYU Deutsches Haus:

Video Lecture on the History of Deutsches Haus:
https://www.youtube.com/watch?v=NS5MTahTknk&feature=youtu.be

Public Events at the Deutsches Haus:
http://deutscheshaus.as.nyu.edu/page/events

Deutsches_Haus_2014-4383

Historical Note: these images were taken on August 1, 2014 and are not altered beyond exposure and white balance adjustment in order to preserve historic archival integrity.  If you would like to use or license copies of these images, please contact Anne Ruthmann Photography directly for more information.

Photo Tip: Using a Tilt-Shift Lens on Washington Square

posted on: March 11, 2014

One of my favorites images from this weekend was tilting the focal plane to focus all the way up 5th Ave from Washington Square....
Washington_Square_Winter-5050-2
(I don't do many art prints, but I love this one so much that if you'd like a copy, contact me with the size you'd like and I'll send you a paypal invoice for your own special edition signed print. ;-))

Washington_Square_Winter-5056

The Tilt-Shift lens was originally designed to simulate what a bellows can do on a large format camera, which has historically been used most often in architectural photography, but with DSLRs this technique has also gained popularity for use as special effect photography, like miniaturizing a scene from above with a shallow plane of focus not usually possible at such focal distances.

Washington_Square_Winter-5047

If you haven't used a Tilt-Shift lens before, here are some basic tips of how you might use it:

What Does Shifting Do?
The "Shift" allows the camera to get a vantage point higher and lower, or further right and left than the actual camera position, without moving the camera.  This is great for when you're at the top of your tri-pod but just need a little extra vantage point, or you're on a rooftop and need your vantage point to be just a little lower without hanging your camera from a ledge.  It's also ideal for creating panoramic images when shifting from side to side and stitching together later without needing to do any additional barrel distortion corrections, because it's basically just adding width to either end of the lens.  This can also help in situations where there's street traffic in front of a building, you can shift your vantage point up to basically eliminate it from the frame without cutting off the bottom of the building.

What Does Tilting Do?
The tilt's main objective is to tilt the focal plane from being parallel to the sensor, to being at an angle from the sensor.  At the extremes of the tilt spectrum, you can end up with a thin line of focus to infinity in just one slice of your image at a much lower f-stop than is possible without a tilt lens.  Most often now the tilt function is used to blur distracting elements that would normally fall on the same plane as a subject, or create the miniature images from focal distances that generally don't make a shallow depth of field possible.  The images in this post and yesterday's were mostly using the Tilt function to create different planes of focus.

Can You Tilt and Shift at the Same Time?
While it's possible to both Tilt and Shift at the same time, the results really aren't going to be as great as if you're just using one function rather than both at the same time because with every exaggerated movement, you're also creating more distortion in the image and letting more light into the camera.  There's a little metal button on the side of the lens that you push to spin the lens element into portrait or landscape mode depending on how you want to tilt or shift the lens- you can even tilt or shift at a diagonal if you'd like, and the lens element will lock the lens in where you'd like.

How Do You Focus a TS Lens?
Because of the mechanics of the lens, there's no auto-focus capability.  You must manually focus the lens and use your eye as a gauge for sharpness with confirmation from your camera's AF points.  Unlike other lenses, you can generally see what's going to be in focus right in the lens, however it can be slightly difficult to distinguish exactly how much will be on the plane of focus depending on your aperture, which is why you should know your focal length math for greatest accuracy.

How Do You Get Accurate Exposures with a TS Lens?
Anytime you tilt or shift the lens, there are light leaks into the lens and the sensor, which means that your camera's meter won't read correctly when you're shifted or tilted.  You can get the closest exposure with your in-camera light meter when the tilt and the shift are set to "0" on the lens- at which point you would set your exposure settings in Manual mode before tilting or shifting to retain proper exposure.

What TS Lens Focal Length Should I Use?
Tilt-Shift lenses only come in prime focal lengths due to the mechanical structure, so if you're going to be using one, you'll need to choose the best focal length for your needs.  The images I've shared here are all from a Canon 45mm TS-E lens which works best if you have some distance between you and your subject, or are using it for more street photography, full size portraits, or product photography.  I've used this lens to get all the flowers down the aisle of a dark church in focus at f/2.8, but it's not wide enough to photograph the Chrysler building when you're on the same street.  The 17mm would be the ideal lens for dramatic sweeping landscape images or shooting ridiculously tall buildings from one street away, the 24mm would be great for interior architecture or photographing smaller buildings and exteriors like homes, and the 90mm would be best for macro or small product photography.  One tip for finding images taken with a particular lens is to search the Flickr catalog of images by the lens name.  There's often either a group dedicated to featuring the lens, or the lens info will show up in the EXIF metadata of images.

Want a little more explanation?  Here are some decent YouTube videos on the topic:

Demonstration of using the Tilt-Shift Lens:

Demonstration of creating a DIY bellows for Tilt-Shift effect:

Popular Posts

Ask Anne All rights reserved © Blog Milk Powered by Blogger